 |
B Series
(B1-B10) |
Hell scrolls are not individualistic works of art. Workshops painted hell scrolls en masse and relied upon guidebooks, pounces or stencils on one hand and a sheer repetition that resulted in producing near replicas on the other. The only mechanically reproduced set of hells scrolls on this website, B Series may appear garish and cheap compared to all its hand-painted counterparts here, but printed hell scrolls were simply a further step in mass production. While the B Series scrolls consist of pre-printed pages glued together like a billboard, they still include the popular stories found in their hand-painted cousins, including Mulian's search for his mother and Taizong's tour through hell. (Image: 71 X 146 cm.) |
 |
C Series
(C1-C6) |
The C series condences ten courts onto six scrolls with Yama and the Wheel-turning King in the fifth and tenth courts respectively still privileged to preside over their own scrolls. With the exception of the first and tenth courts, the actual contents of particular scrolls are not fixed. Like Legos, the tortures, heroes and villains can be snapped together in any combination that fits the spatial dimensions. Thus there is little problem of multiple judges overseeing a common court. In terms of particular composition, compare the lower portions of these scrolls with those of A journey through Chinese hell by Neal Donnelly, pp. 65-105 and Ten kings of Hades: The Vidor collection, pp. 27-49. It is not uncommon for three or four identically composed torture scenes to be replicated in tandem with one another on different sets of scrolls even if other parts of the scrolls radically differ. (Image: 79 X 151 cm.) |
 |
D Series
(D1) |
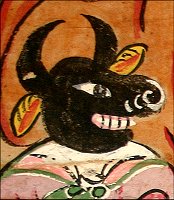
With the D Series, the condensation is complete, and all ten magistrates appear on a common scroll. Similar to the H series which also groups all ten courts together (below), this scroll boasts a very different style and is the most cartoonish in its simplicity. While its provenance is unknown, it is indicative of southern China and is similar to others from that region that now hang in museums such as the Art Gallery of New South Wales. (Image: 49 X 135 cm.) |
 |
E Series
(E1-E10) |
Commissioned in 1972 by Joe Kagle in I-Lan, Taiwan, the E Series has never been used, its colors extremely vibrant and the scrolls in general as yet unblemished. In fact, this set might be considered not quite finished because its texts are limited to identifying the magistrates and a couple architectual structures even though there is empty space for cartouches and advisory statements. Regardless, this set is definitely in the best condition relative to the rest of the Taizong's Hell collection. (Image: 74 X 145 cm.) |
 |
F Series
(F1-F2) |
The F Series is distributed between only two scrolls with five courts on each, and while Yama and the Wheel-turning king do not preside over their own scrolls here, they still sit atop each of these scrolls. Here there is little room for gruesome tortures, and the emphasis is on the magistrates and their bureaucracy. (Image: 80 X 147 cm.) |
 |
G Series
(G1-G2)
|
The G series is actually not a complete series and is missing its third (or third and fourth) scrolls. The first three courts are depicted on the first scroll, and the second three on the second. Vapor trails cover the backgrounds of these scrolls, apparently transforming hell into an ethereal realm. (Image: 79 X 160 cm.) |
 |
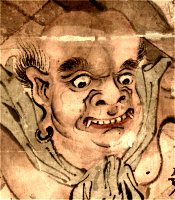
H Series
(H1-H3) |
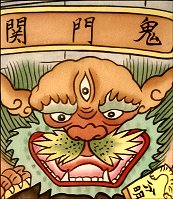
Like the D series above, the H series seems to be in the southern style and gathers all courts onto a single scroll. Yet what is unique about this series is the two flanking scrolls of guardian images, thereby making this a three-scroll set. While they are physically among the smallest scrolls, these guardian images are among the largest within the hellish population of this collection. On their backs, these scrolls bear the "trademark" (jihao) of a certain Deng Falin. As these scrolls are usually produced from artisan workshops and not artists, they are rarely signed. (Image: 46 X 111 cm.) |
 |
I Series
(I1-I10) |
Most sets of hell scrolls are sadly undated, but this particular set of ten was made around 1919, judging from a dedication date given on the seventh scroll. The eighth hell is clearly of the same template as S4, and of the sixth paths of reincarnation in the tenth hell, three of them are as humans rather than just two. (Image: 63 X 135 cm.) |
 |
J Series
(J1-J10) |
The order of these ten hells is uncertain because, oddly enough, none of the hells are labeled. It is possible that the numerical labels were on a separate piece of paper positioned above the picture but not included when the scrolls were remounted. I could only separate the first five from the second because the first five usually face right and the second left. In terms of other content, there is both a bridge leading off to paradise and punishments being assigned in the first scroll, and Yama's ferocious face is distinctive in the fifth. The tenth scroll with its reincarnation paths is also easy to identify. This set had been temporarily broken up into a group of six and a group of four scrolls, but I managed to re-unite them. (Image: 61 X 111 cm.) |
 |
K Series
(K1, K5, K6, K10) |
K series is a partial set of four scrolls from what was presumably a set of ten, and like the J series above, the hells are not numerically labeled. Of the four, three seem to be readily identifiable as the first hell with its entrance gate, the fifth hell overseen by Yama with his darkened face and the tenth hell with its six paths of reincarnation. I have no idea as to which hell the fourth scroll indexes and have arbitrarily dubbed it the sixth hell for now. (Image: 60 X 120 cm.) |
 |
L Series
(L1-L10) |
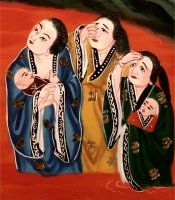
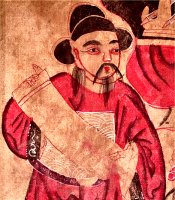
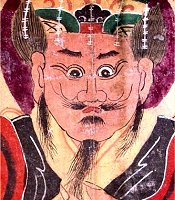
L series is remarkable for two reasons. First, it serves as a useful catalog of the stories that inform the popular notion of hell. Each of the ten scrolls alludes to at least one narrative, some of which are better known (such as Taizong visiting hell or Mulian rescuing his mother there) and others less so (such as the punishment of the rebellious Empress Lü, wife of the Han Dynasty's founder). Second, the costuming and cosmetics seem to evoke operatic gestures, which should not be entirely surprising as many of the narratives informing hell are preserved through operas. The seventh hell is a particularly good example with the whited faces, the exaggerated eyebrows and the elaborate hats. |
 |
M Series
(M1-M2) |
Only reunited after several years when the dealer in Yunnan endeavored to sell them separately, the two scrolls of the M series - each with five hells - are in my opinion the best in the collection, their detail, quality of painting and size far outstripping the rest. (Photographing these hell scrolls in general has been difficult, but this pair in particular has been hard due to their size and detail.) Like the L series, there are at least ten identified popular narratives being played out among the courts. (Image: 92 X 171 cm.) |
 |
N Series
(N1-N10) |
With the kind help of Joseph Vincent, a former student of mine who had moved to Taiwan, I commissioned my own set of hell scrolls in 2013. The broker ran a shop on Xiyuan Road near Taipei’s famous Longshan Temple, and he told us it takes about fifteen days to paint a set. We also found the book that provided the line drawings from which this set of paintings was made, namely Sanjiao shengxiang huaji 三教聖像畫集, published in 1973. |
 |
O Series
(O2-O9) |
This partial set (missing the first and last of this set of ten) of small paintings (each only 37 cm wide) might be regarded as “folk art” relative to others in this collection. Each is dominated by a single judge with only one or at most two types of torture scenes depicted beneath him. Regarding their provenance, there is a sexagenary date (巳卯) of manufacture on the back of one scroll which could be either 1939 or, presumably less likely, 1879. There are other short texts on the backs of other scrolls. |
 |
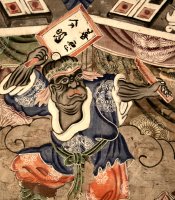
P Series
(P3, P5, P6, P8, P9) |
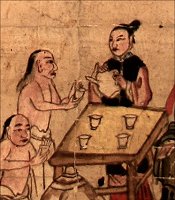
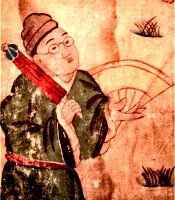
Acquired in 2017, these scrolls were clearly part of a single set judging from the way the name of the magistrate on each scroll is unusually obstructed by a fan, a headdress or even a cloud. Most interesting is the gambling and opium smoking that is taking place at the bottom of P6 and the destruction Guanyin is bringing to P9 (in which the torture tools are breaking in half, the officials are falling over and dropping their books and Oxhead is running away in fright, holding onto his horns). (Image: 64 X 144 cm.) |
 |
Q Series
(Q1) |
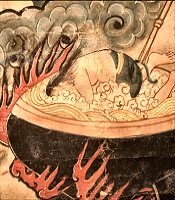
While much faded, this comprehensive portrayal of hell in a single image includes Dizang presiding over all ten magistrates as well as hell's most common landmarks (e.g. the compound of untimely deaths, the gate of rebirth, and the Naihe River) and tortures (e.g. the oil caldron, the superheated flue, the knife hill). |
 |
R Series
(R1, R2, R3, R4) |
The most interesting image in the four remaining scrolls of this set is Dizang’s intervention, his mercy breaking and burning the torture devices while lotus flowers blossom in hell. |
 |
Single Scroll 1
(S1) |
The first three orphan or "single scrolls" (S1, S2 and S3) are similar in construction, and unlike the other scrolls which are painted on paper and mounted, these three are painted directly onto canvas. Their poor condition and terse detail sadly makes them less informative than their counterparts in the collection, but they still offer some insights into their production. Specifically, scrolls S1 and S2 are identical in composition even though they differ in some details. (Image: 61 X 122 cm.) |
 |
Single Scroll 2
(S2) |
Similar to S1 in composition, this heavily stained scroll includes the standard tortures of boiling caldrons and tongue ploughing as well as a group of worthies being led to (presumably) the Western Paradise of Amitabha. Like S1, it also employs the image of the net capturing the sinful, an image not common to the other scrolls in this collection. (Image: 61 X 122 cm.) |
 |
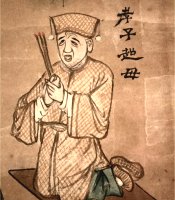
Single Scroll 3
(S3) |
This third canvas scroll differs in content from S1 and S2 and is perhaps the last of a set because it shows the scene of Mdm. Meng offering the tea of forgetfulness (which is why none of us remember our past lives or our passage through hell) in close proximity to the six paths of reincarnation. It also offers another image of Emperor Taizong being accused by the beheaded river dragon. (Image: 61 X 122 cm.) |
 |
Single Scroll 4
(S4) |
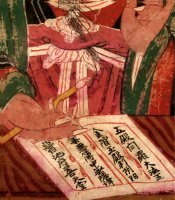
The simpler style of S4 is also unlike most of the other scrolls in the collection; it is given over to blocks of color that were then filled in with detail. It also seems to have spaces for the addition of texts, namely over and to either side of the magistrate's head as well as in the empty box on the right side of the scroll. (For examples in which that box is texted, see S5 and S6.) This scroll clearly uses the same template as I8 above. (Image: 61 X 132 cm.) |
 |
Single Scroll 5
(S5) |
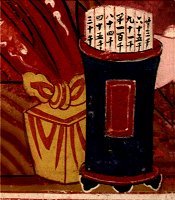
According to the document on the magistrate's desk, S5 represents the second court of King Chu Jiang even though Mdm Meng is here serving her tea of forgetfulness. Unfortunately the text to the left is no longer decipherable, but the vase on the right contains lots listing lifespans. The focus of this scroll is not on tortures, and the upper half is devoted to stellar deities. It most likely belonged to the same set as S6. (Image: 66 X 153 cm.) |
 |
Single Scroll 6
(S6) |
Most likely of the same set as S5 above, S6 depicts the fifth court of King Yama, and again the upper half is given over to the images of stellar or meteorological deities. The box on the left is largely legible and mostly consists of names and a date on the sexagenary cycle of 1923. (Image: 68 X 153 cm.) |
 |
Single Scroll 7
(S7) |
Acquired via Shanghai, S7 gives us the remarkable opportunity to study the mass production of hell scrolls by comparing it with A10, acquired via Taiwan. The composition and style are nearly identical with only minor differences such as the inclusion of a window in one, different eaves on the principal building and (rarely) different decorations on a few people's robes. (Image: 74 X 154 cm.) |
 |
Single Scroll 8
(S8) |
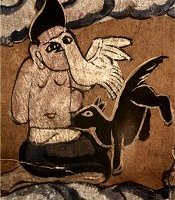
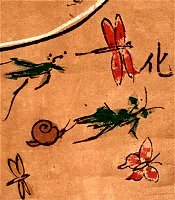
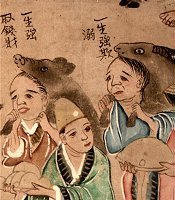
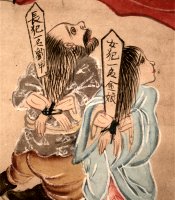
Depicting the tenth court, S8 is particularly interesting in how it shows the six forms of rebirth as the dead are given the hats or pelts they will don in the life to come. The cartouches explain the sins or merits that justify the new attire. Among the animal rebirths, there are here depicted future cattle, horses, sheep, pigs, ducks, chickens, deer and tigers. Continuing the animal theme, the scroll in its upper righthand corner depicts the merit of releasing animals from the marketplace back into the wilds. (See A5 for other images of the same and a discussion.) (Image: 79 X 145 cm.) |
 |
Single Scroll 9
(S9) |
Like S7 above, S9 provides a another opportunity for understanding the mass production of hells scrolls, but unlike S7, here while the composition is identical to one of the scrolls in the A Series (namely A6), the style is very different. Every character, pose, foot and hand is in the same place on either scroll, but their manner of depiction are not at all similar. (Unfortunately when this scroll was remounted as some point in its history, the upper fifth of it was removed.) (Image: 75 X 121 cm.) |
 |
Single Scroll 10
(S10) |
Perhaps of the same series as S17 (below), S10's style moves well beyond the cartoonish art typical of most scrolls on this website and could perhaps be described as more painterly, as representative of the genre of Chinese figure painting. Faces are no longer generice and become quite expressive. The floor is tiled. The demons now have muscle tone (or, more interestingly, a lack of muscle as their bodies are not romantically portrayed). If there is a spectrum of "craft" and "art," this scroll is leaning toward the latter. (Image: 79 X 145 cm.) |
 |
Single Scroll 11
(S11) |
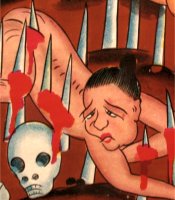
In very poor condition, S11 depicts the fifth court of "Son of Heaven Yama," and what is perhaps most striking here is the strong symmetry of composition that is generally lacking in other scrolls. Even the number and type of figures are mirrored along the central axis from top to bottom. (Image: 77 X 146 cm.) |
 |
Single Scroll 12
(S12) |
While S12 isn't technically a hell scroll and lacks the didactic element of revealing certain punishments for certain crimes, King Yama still figures into this portrayal of heaven and hell. Above, the sun, moon and stellar deities process through the sky with presumably the emperor of heaven seated in his dragon-drawn carriage. Below, his counterpart Yama is escorted by his demons, the fan above his head announcing "The Earth Agency's King Yama of the Fifth Court." (Image: 78 X 143 cm.) |
 |
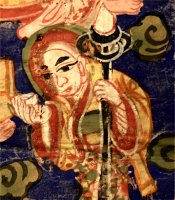
Single Scroll 13
(S13) |
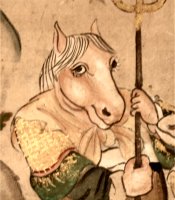
Like S12 (above), S13 depicts a heavenly entourage in contrast to their underworld counterparts. In addition to Horse-face and Ox-head, Kshitigarbha or Dizang is dressed as a monk and holds his traditional alarm staff while riding a tiger-like beast. (Image: 80 X 150 cm.) |
 |
Single Scroll 14
(S14) |
Depicting the third court of hell, S14 is similar in style to S11 and may have originally been from the same set. Although no one is actually being tortured in this portrayal, it depicts the kharma mirror, the virtue of collecting and ritually burning paper with text on it and the processions of captured villains such as the infamous Qin Gui (see A6 for details). (Image: 77 X 146 cm.) |
 |
Single Scroll 15
(S15) |
Also perhaps belonging to the same set of scrolls as S11 and S14 (or at least of a similar style) but surviving in a better condition, S15 portrays the ninth court of King Dushi with traditional tortures such as the weighing of cheating merchants on scales, vertically rending and tiger attacks on hunters. Mulian and references to other narratives also appear among the clouds. (Image: 77 X 146 cm.) |
 |
Single Scroll 16
(S16) |
Yet another possible scroll from a set that may have included S11, S14 and S15 above, S16 depicts the fourth court but is in extremely poor condition. It includes the freezing hell and knife hill as well as the tortures of being bound to a hot copper furnace chimney or being forced to swallow superheated metal pellets. (Image: 77 X 144 cm.) |
 |
Single Scroll 17
(S17) |
Probably of the same set as S10 above, S17 is extremely artistic when compared to its relatively cartoonish cousins and vaunts the style of traditional Chinese figure painting. In addition to eviscerations and the condemnation of breaking up someone's marriage, this court again focuses on the procession of the captured Qin Gui (see A6 for details). (Image: 81 X 145 cm.) |
 |
Single Scroll 18
(S18) |
This scroll is clearly related to the A series, its design and content mirroring A's fourth court in particular, but here it's the eighth court and the inscriptions are different. Hence this scroll gives us clues as to scroll production, the texts (even down to the identification of which hell) more variable than the picture programs. |
 |
Single Scroll 19
(S19) |
Technically not a hell scroll but accidentally included among others I had purchased, this scroll is dedicated to Guanshiyin [a.k.a. Guanyin], its label reading "A place for paying homage to bodhisattva Guanshiyin." The last character meaning "place" or "placeholder" (wei) is regularly found at the bottom of spirit tablets that mark where that particular spirit will be honored, somewhat like a reservation card on a table at a restaurant. Guanyin regularly appears as a savior figure in hell scrolls -- see E1, I3, J9 and S18 for examples. (Image: 61 X 116 cm.) |
 |
Single Scroll 20
(S20) |
This scroll is also not a hell scroll per se, but it's the Court of the Southern Marchmount. According to the signage, Bigan who had been murdered by the last Shang ruler, his heart then dissected to see if it looked sagely, is here filing charges. More interestingly, a funeral is underway in the lower part of the scroll. |
 |
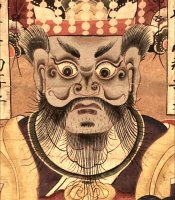
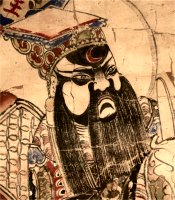
Single Scroll 21
(S21) |
S21 and S22 probably came from the same set, and they both bear a dedication date of 1735 as well as a place of origin in Sichuan province. While the scenes and motifs are standard, the magistrate's visage is particularly striking and is probably that of Yama due to his darkened complexion. |
 |
Single Scroll 22
(S22) |
Bearing the same date and place of origin as S21, the particular court is unidentifiable, but what is unique about this scroll is how it focuses on a single punishment, namely the caldron of boiling oil. |
 |
Single Scroll 23
(S23) |
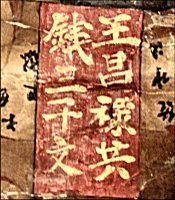
This scroll is almost identical to one in the Donnelly collection – see p. 59 of A journey through Chinese hell – which Donnelly attributes to a certain Ho Hsin-yen (b. 1899 or 1900) from Hsin Chu County Donnelly (p. 22) writes, “Ordinary artists were content to paint dull figures on white paper, but Ho Hsin-yen inclined towards vivid hues and believed a colorful background highlighted the message and added artistic value.” Relative to the other scrolls in this collection, the red background of this scroll is indeed striking. While the colors and format are nearly identical, ours fortunately has a great deal more text, mostly about Madame Meng’s tea of forgetfulness. |
 |
Single Scroll 24
(S24) |
This scroll possibly depicts the fourth hell, but wuguan 五官 is here instead kuguan 庫官 which is intriguing because there are several rickshaw pullers gathered in the lower left, sitting in a group as they break for tea. Also of interest is the Buddhist orchestra and the mourners burning paper money. (Image: 62 X 125 cm.) |
 |
Single Scroll 25
(S25) |
Depicting the seventh hell of Taishan, this scroll possibly belongs to the P series above (and was acquired at the same time). (Image: 64 X 144 cm.) |
 |
Single Scroll 26
(S26) |
The Eastern Peak or Dongyue 東嶽 refers to the overseers of life and death, and here an auspicious birth is underway. Worship of the Eastern Peak is separate from and predates the ten magistrates, although it also came to coexist with them. (Sometimes the Eastern Peak is even incorporated into the system of the ten hells, becoming a subsequent bureaucratic office or "supreme court" overseeing all ten.) Many Eastern Peak temples survived into the twentieth century. (Image: 57 X 114 cm.) |
 |
Single Scroll 27
(S27) |
In poor condition, this scroll is most likely from the same set as S28 (which was acquired at the same time). It features the worthies being led off to the Pure Land across the bridge whereas the unworthies, stripped of their clothes (which are now hanging in the trees) are instead consigned to the snake-filled waters below. |
 |
Single Scroll 28
(S28) |
Also in poor condition, this scroll is most likely from the same set as S27 (which was acquired at the same time) and features the knife hill. |
 |
Single Scroll 29
(S29) |
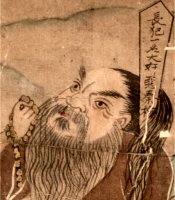
Dated 1882, this depiction of the tenth hell shows the magistrate "clearly proclaiming evil and good" while his attendants distribute the new human clothes or animal pelts the dead will wear in the next life. |
 |
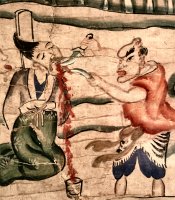
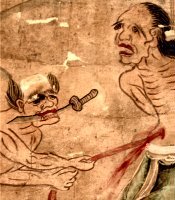
Single Scroll 30
(S30) |
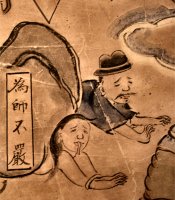
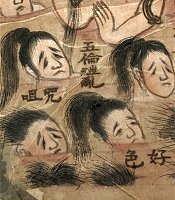
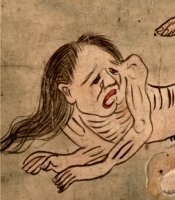
Whereas swindlers, poisoners and fraudsters get chopped in half here in this depiction of the second court, those who "delighted in chatting about matters of the boudoir, sang licentious songs and cited the classics when making fun of others" get their tongues ploughed by way of retribution. |
 |
Single Scroll 31
(S31) |
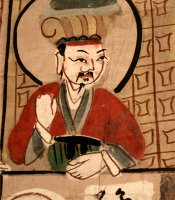
Most of this scroll is devoted to the higher powers hovering over the magistrate -- perhaps the first magistrate as this appears to be the gate of hell -- who "clearly distinguishes between evil and good." |
 |
Single Scroll 32
(S32) |
Like its doppleganger S33, this scroll depicts the third and fourth hells, their tortures including sword trees, tongue ploughing and being steamed like a dumpling. Several worthies cross the Naihe bridge to journey to the Western Heaven. |
 |
Single Scroll 33
(S33) |
Nearly identical to S32 except for some color choices and different texts, here's another good example of how these scrolls were "mass produced" by hand in artisan workshops. |