About 3D Modeling and Printing

Perhaps you’re interested in 3D printing? Though full of possibilities, 3D printing has remained outside the realm of casual tinkering because of cost, accessibility, and standard procedure. Recently however, 3D printing has become relatively cost-friendly! You don’t even have to own your own printer; companies such as shapeways will print your models for you at a (usually) reasonable cost! Many universities are adopting one or more 3D printers as well (even non-engineering-or-design schools, such as Reed), so if you are student there is a good chance that you can get access to a printer in person. If you are intrigued by the actual printing process yourself, this is a great blog for technical info: Reed College Fab Lab.
3D Modeling
So you want to make a 3D object. If you happen to be reading this article, there’s a decent likelihood that you have some knowledge about this, but I think that my experience can be beneficial to both newbies and amateurs. For my work here at Project Project, I am making models based on mathematics (so there is not as much hands-on molding as other kinds of 3D design), so I have opted to use some softwares that are geared toward automation and math, primarily Mathematica (paid) and Blender (free). Mathematica is pretty much one-of-a-kind, but an alternative could be MatLab (paid) or Sage (free and open source). Blender is great, but is not very beginner-friendly. I highly recommend reviewing a tutorial for Blender if you want to get into 3D design.
As for Mathematica, here are some extremely useful tools, options, and commands that you should know about:
Tube
If you are trying to make any sort of wireframe model, this is what you need. If you feed it a list of coordinates, it will stretch a tube across them. This is a great introduction to using tubes in a mathematical modeling context; the code was written by Henry Segerman, whose math and 3D printing work you can find on his neat website: segerman.org. Here’s a non-dramatic example:
ParametricPlot3D[{Cos[x], Sin[x], Cos[Sin[x]]}, {x, -Pi, Pi}, Boxed ->; False, Axes ->; False, BoxRatios ->; {1, 1, 1}, PlotStyle -> Tube[0.1], PlotRange -> All]
RegionPlot, RegionPlot3D, Thickness
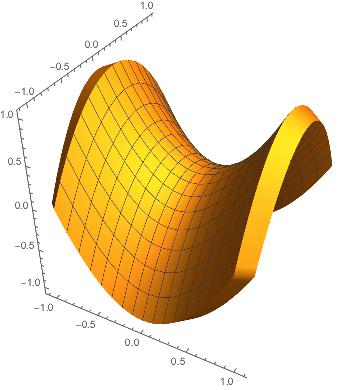
These are essential for making any non-wireframe plot. If you need to fill a volume, RegionPlot3D does exactly what you think. As for RegionPlot, or just normal Plot3D and its variants, Mathematica will give you a flimsy 2D surface. There are strictly mathematical ways to, essentially, turn them into RegionPlot3Ds, but an efficient trick is to adjust the Thickness with a ParametricPlot3D:
ParametricPlot3D[{x, y, x^2 - y^2}, {x, -1, 1}, {y, -1, 1}, PlotStyle ->; Thickness[0.2]]
PlotPoints
To make a mesh nice and smooth for printing, you will often want to adjust this. A high quality output will result in a much nicer print, especially even if you aren’t using the highest quality printer. More plot points will make your program take longer to execute, but its worthwhile. For most plots, around PlotPoints -> 200 is more than plenty. For some tricky plots (you continue seeing odd mesh behaviors at 200), you will need to go higher.
RepairMesh
Mathematica’s quick fix tool. This is great for fixing up expected problems with your mesh, such as if you have a lot of vertices/faces crossing at certain points. This won’t fix everything, however. If your mesh is having serious issues, you may need to adjust your code or bring it into Blender.
Export
This is your main tool in Mathematica for 3D printing. There are a few different 3D model types floating around out there, but the relevant one’s here are .stl and .obj. Mathematica will export your Graphics3D object to .stl with
Export["/path/to/filename.stl", yourGraphics3Dthing]
and then you are good to go! Almost all 3D printing software will accept this format. If you need to embed your file online (such as is done on this blog using Three.js), .obj may also be a nice file to work with. Unfortunately, Mathematica doesn’t do a great job exporting to .obj, so you will need to import the .stl from Mathematica into Blender, and then export that again to .obj.
Printout3D
This is the fancy version of Export. If you need to export to .stl and you aren’t concerned about the size units of the file or any potential mesh problems, then Export will work fine for you. If you want a more polished .stl, then Printout3D will automatically RepairMesh in addition to offering the following options:
Method: If you would like to generate your model using a specific algorithm, Mathematica provides a few options besides the default. The Methods page explains them in detail.TargetUnits: Specifies the units to use in your .stl. This is particularly useful if you want to share your .stl with others for printing while maintaining a standard real-world scale for the copies.- Printing Service: Mathematica integrates four different options for outsourcing your printing, directly from your code! The options are “IMaterialise”, “Sculpteo”, “Shapeways”, and “3DHubs”. Include the option in place of the file name argument. I have not personally used this feature, but many prints modeled here at Reed, including one of my own, have been printed by Shapeways. They do a great job, using high quality materials and methods, and it is becoming more affordable every day! Check out their website here: shapeways.com
3D Printing
For details on actually getting a printer up and running, I again recommend that you take a look at this blog: Reed College Fab Lab. Anyway, here I will focus on the general steps of getting software and exporting your model to a printable file.
1. Printing Software
For a huge variety of printers, including all Ultimaker/Makerbot printers, Cura is what you want (a download button is included on the linked page). Once loaded up, Cura allows you to import your models and adjust them on your build plate. Things to keep in mind:
- Maximize the model’s contact with the build surface. This will increase the model’s stability during the print.
- Minimize overhang – that is, any part of the model that is extruding out at less than about 45 degrees from horizontal. If your printer can use dissolvable support material (demo), this becomes less of an issue, but is still a matter of efficiency maximization.
2. Finally, Print!
Ok, you’re finally ready to go! And wait for around for 5+ hours, that is. Once you’ve configured everything in Cura, export the print (usually in .gcode format) to your USB drive, load it up on your printer, and hit start. Prints take a long time, so you probably won’t want to stand in front of your printer for the entire duration. However, the first 5-10 minutes of a print are the most important–90% of problems will occur during this window. Usually these problems will be issues with the file, issues with the hardware setup, etc. But it is truly the most annoying thing when you start a print and come back the next day to find that it caught an error after two minutes and halted. From my experience, I recommend checking on the print after 10 minutes and again after an hour or so, before leaving it to work overnight. This way, you can restart the print if there’s an issue, and you don’t lose a whole night of print time.
Good luck printing! If you just want to try printing something for fun, or modifying an existing 3D model for printing, check out Thingiverse and Shapeways. My print of Gradient Flow was just shipped off to Shapeways, and I’ll have updates on it within two weeks.
About the author
I am a computer science and math student here at Reed college. I live in the bay area in California, but much prefer the cooler and rainy weather in Portland. For this summer, I am working with Kyle on visualizing Gradient Flow, hopefully along with some aspects of Morse theory, and Milnor Fibrations. Along with mathematical visualization, I also am very interested in simulation. A lot of my work is available on my github page. Specifically, I investigate cellular automata variants and functional programming. Email me if you are interested in Reed, Project Project or any of my other work!