Fabrication of Bodies of Constant Width
Last time we discussed the math behind finding support functions for bodies of constant width with the symmetries of various subgroups of . This time we’ll walk through the process of creating one of these bodies in reality with a 3D printer. Let’s start with choosing a symmetry group. We have a number of options: tetrahedral, icosahedral, octahedral, cyclic, and dihedral. Since we’ve already shown off tetrahedral, octahedral, and icosahedral, let’s try creating a body of constant width with cyclic symmetry!
Objects with order cyclic symmetry are symmetric under rotation around an axis by degrees.

The starfish has order 5 cyclic symmetry.

The throwing star has order 4 cyclic symmetry.
Let’s pick the order 4 cyclic symmetry group, so that our final object will share symmetries with the throwing star above. This group is particularly nice since it has a very simple representation. Consider all the ways you can rotate the throwing star so that it ends up looking the same. Every such rotation must be equivalent to some number of consecutive 90 degree rotations. This means that we only need to know how to represent this 90 degree rotation to generate every possible rotation in the group. A rotation by 90 degrees moves the unit x vector to , and the unit y vector to , while leaving the unit z vector unchanged, and so has the matrix representation:
This matrix generates the entire cyclic group of order 4. We can now use Magma as described in our previous post to determine the invariant polynomials–functions which exhibit this cyclic symmetry:
> C := MatrixGroup<3, Rationals()|[ 0, -1, 0, 1, 0, 0, 0, 0, 1 ]>;
> R := InvariantRing(C);
> PrimaryInvariants(R);
[
    x3,
    x1^2 + x2^2,
    x1^4 + x2^4
]
> SecondaryInvariants(R);
[
    1,
    x1^3*x2 - x1*x2^3
]
With these primary and secondary invariants, we can generate homogeneous polynomials of any degree which have this cyclic symmetry. The polynomial , for example, or . Recall, however, that we need to use odd degree polynomials to create a body of constant width. As discussed last time, we can find a basis for these invariant polynomials of a given degree. Here’s a basis for degree 5:
We’ll also want to orthonormalize this basis, since we want the final solids to be as visually distinct as possible. Orthonormalizing with respect to the polynomial inner product should meaningfully distinguish the polynomials and in turn distinguish the solids. In this case, we get:
So, we can use any of these four functions, and any linear combination of these functions. What do they look like?
Body derived from in the above basis.
Body derived from in the above basis.
Body derived from in the above basis.
Body derived from in the above basis.
These bodies were created using the gradient parametrization described in the first post, and represent “basis” surfaces, so we can combine them in any way we like to create a new surface which has constant width and order 4 cyclic symmetry. For example, the polynomial
(i.e. in the above basis) is particularly nice:
Let’s print out this body! We used an Ultimaker 3D printer and software Cura to prepare the model for printing. One thing to keep in mind for prints like these is that the object needs to be supported from underneath if there is overhang–that is, any portion of the object which is unsupported from below. Cura, and similar software, can automatically add this support structure:
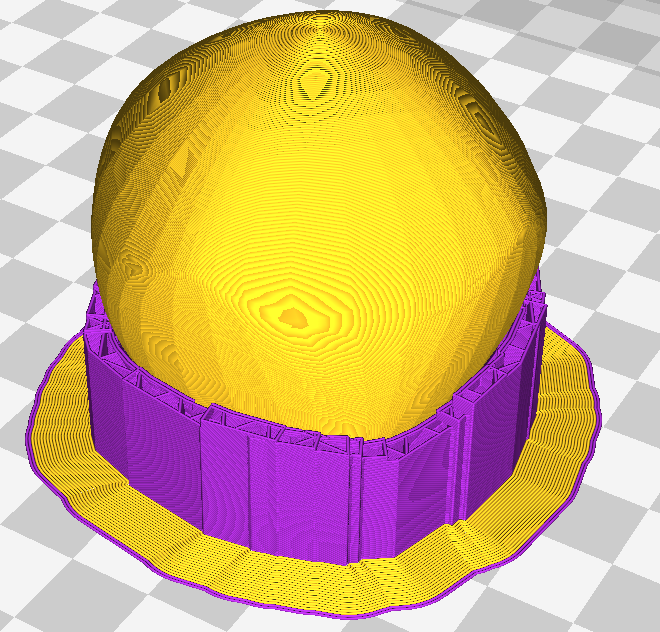
Screenshot from Cura. The purple region will be printed using dissolvable material.
With the Ultimaker, we can print using two different materials, so the support pad can be made out of dissolvable material. The final product is pictured below.
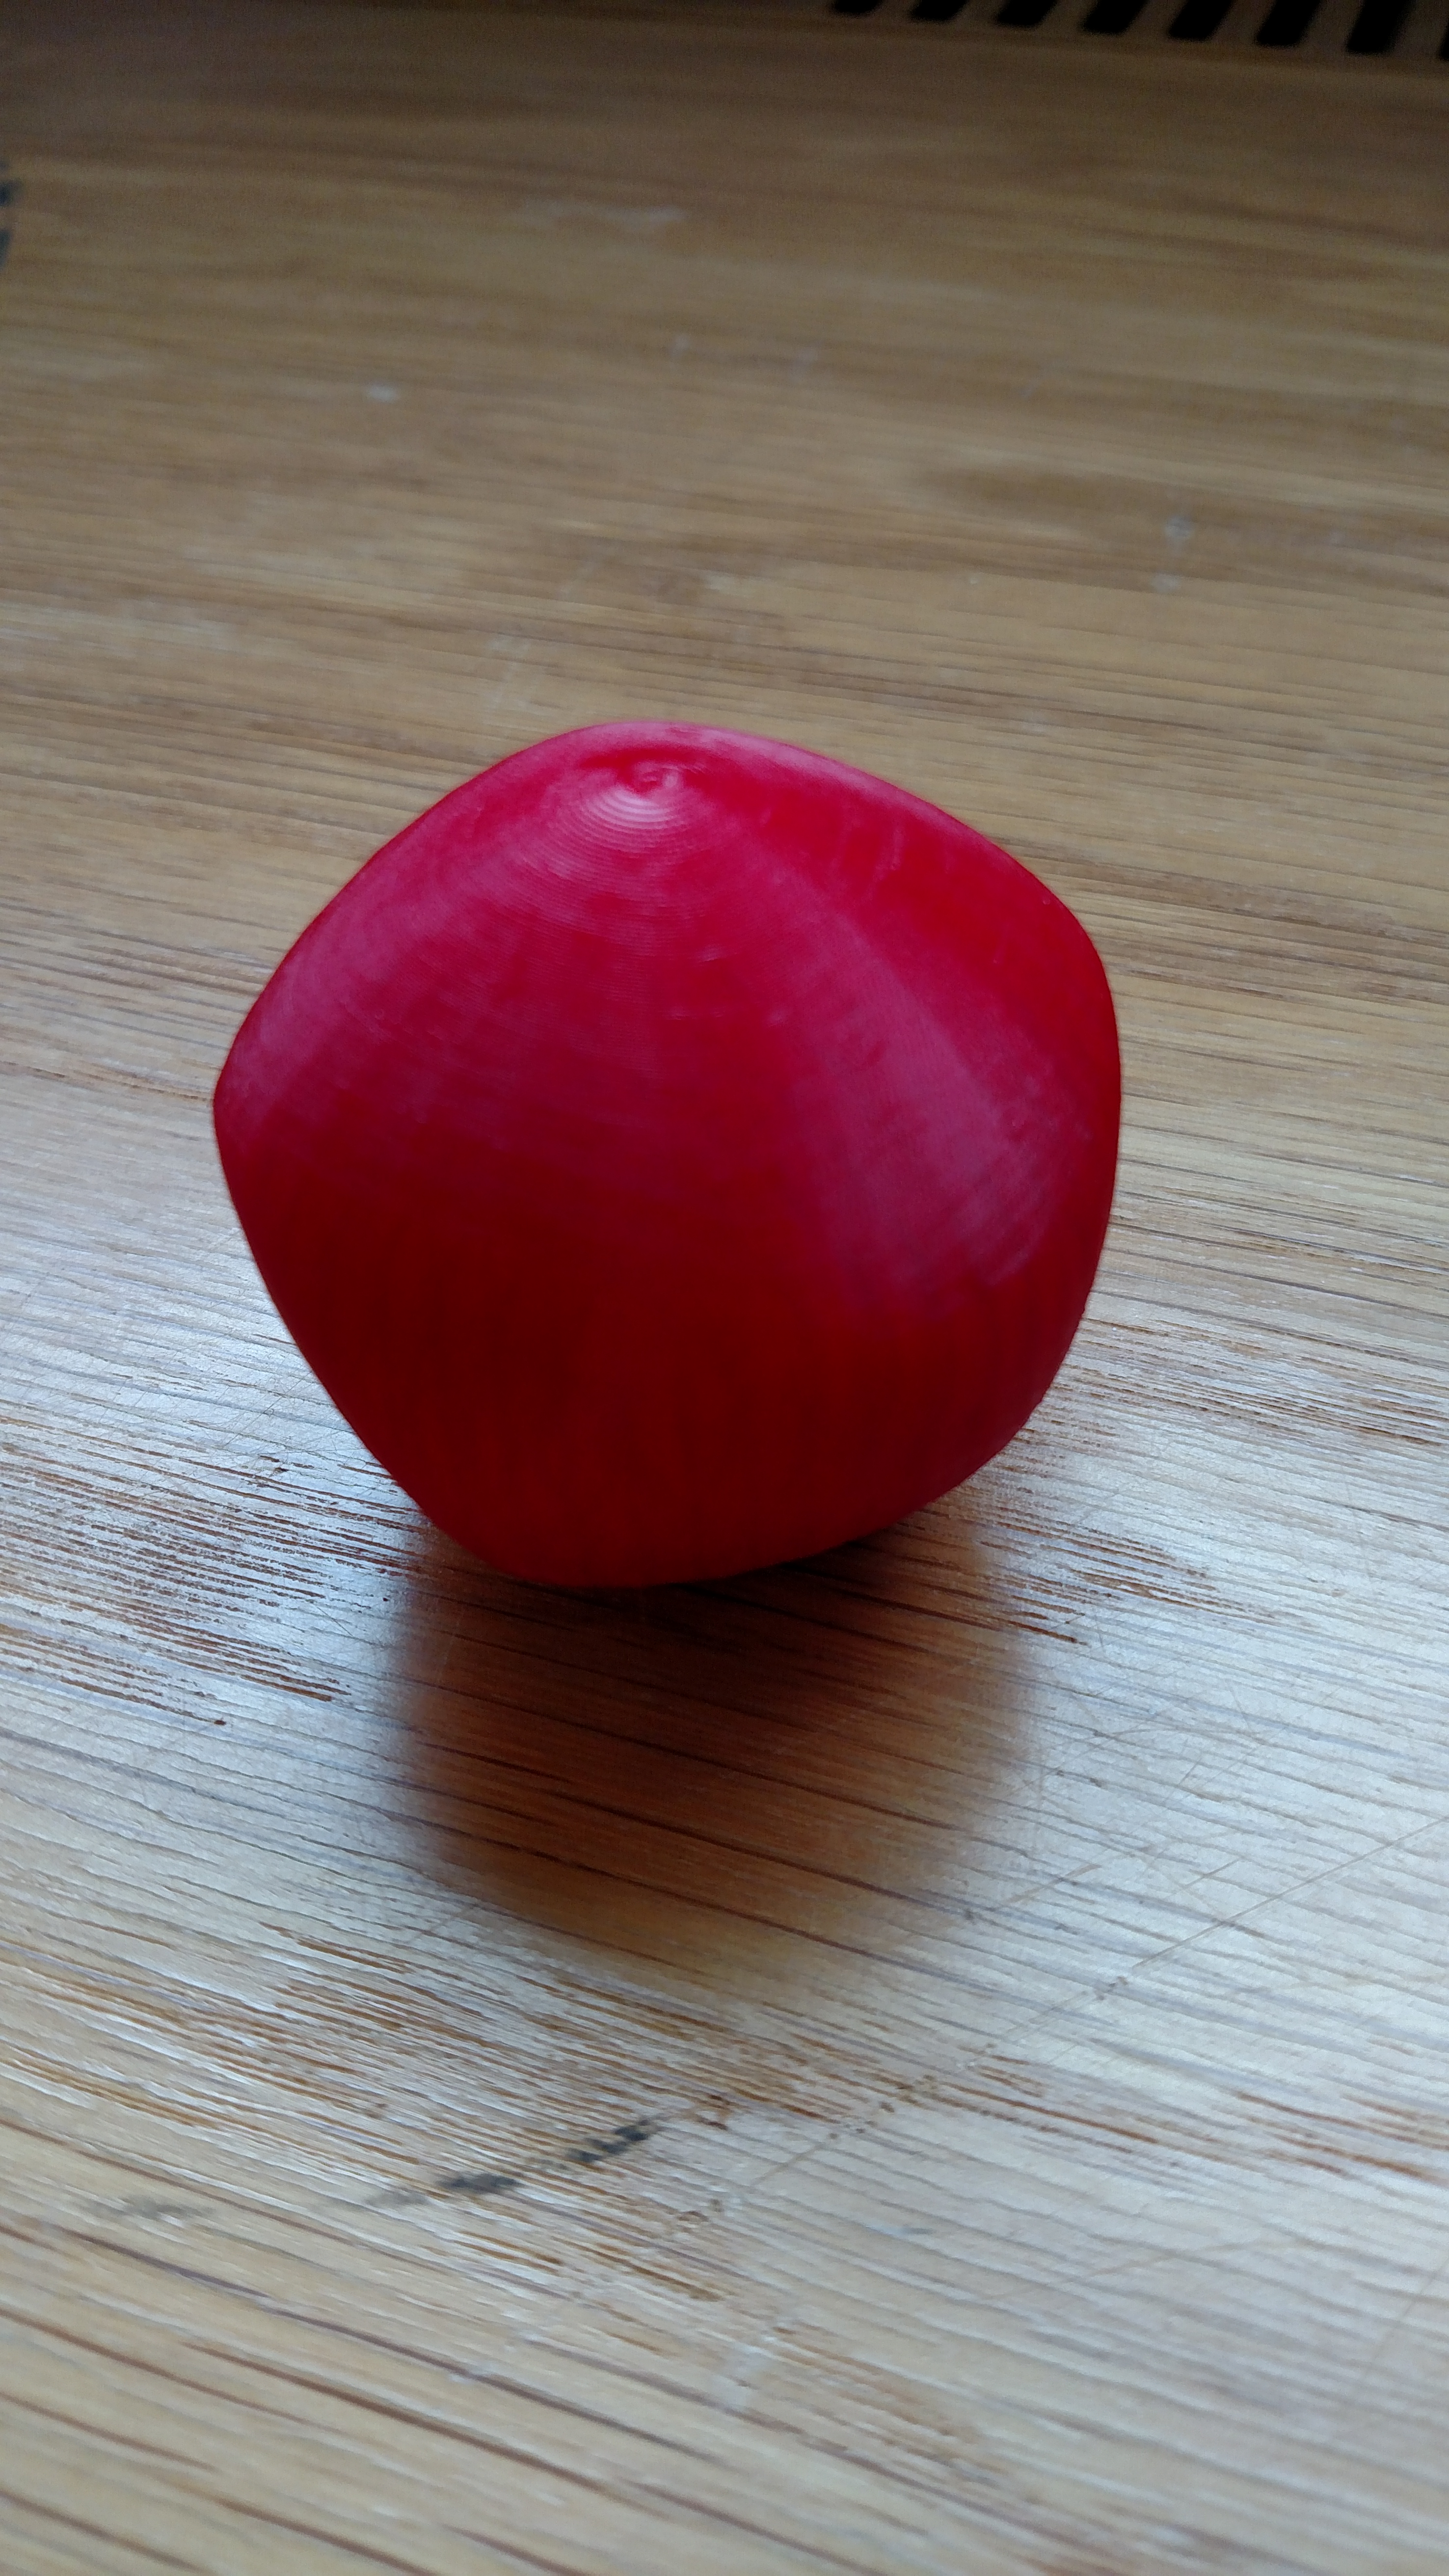
3D printed body of constant width with cyclic degree 4 symmetry.
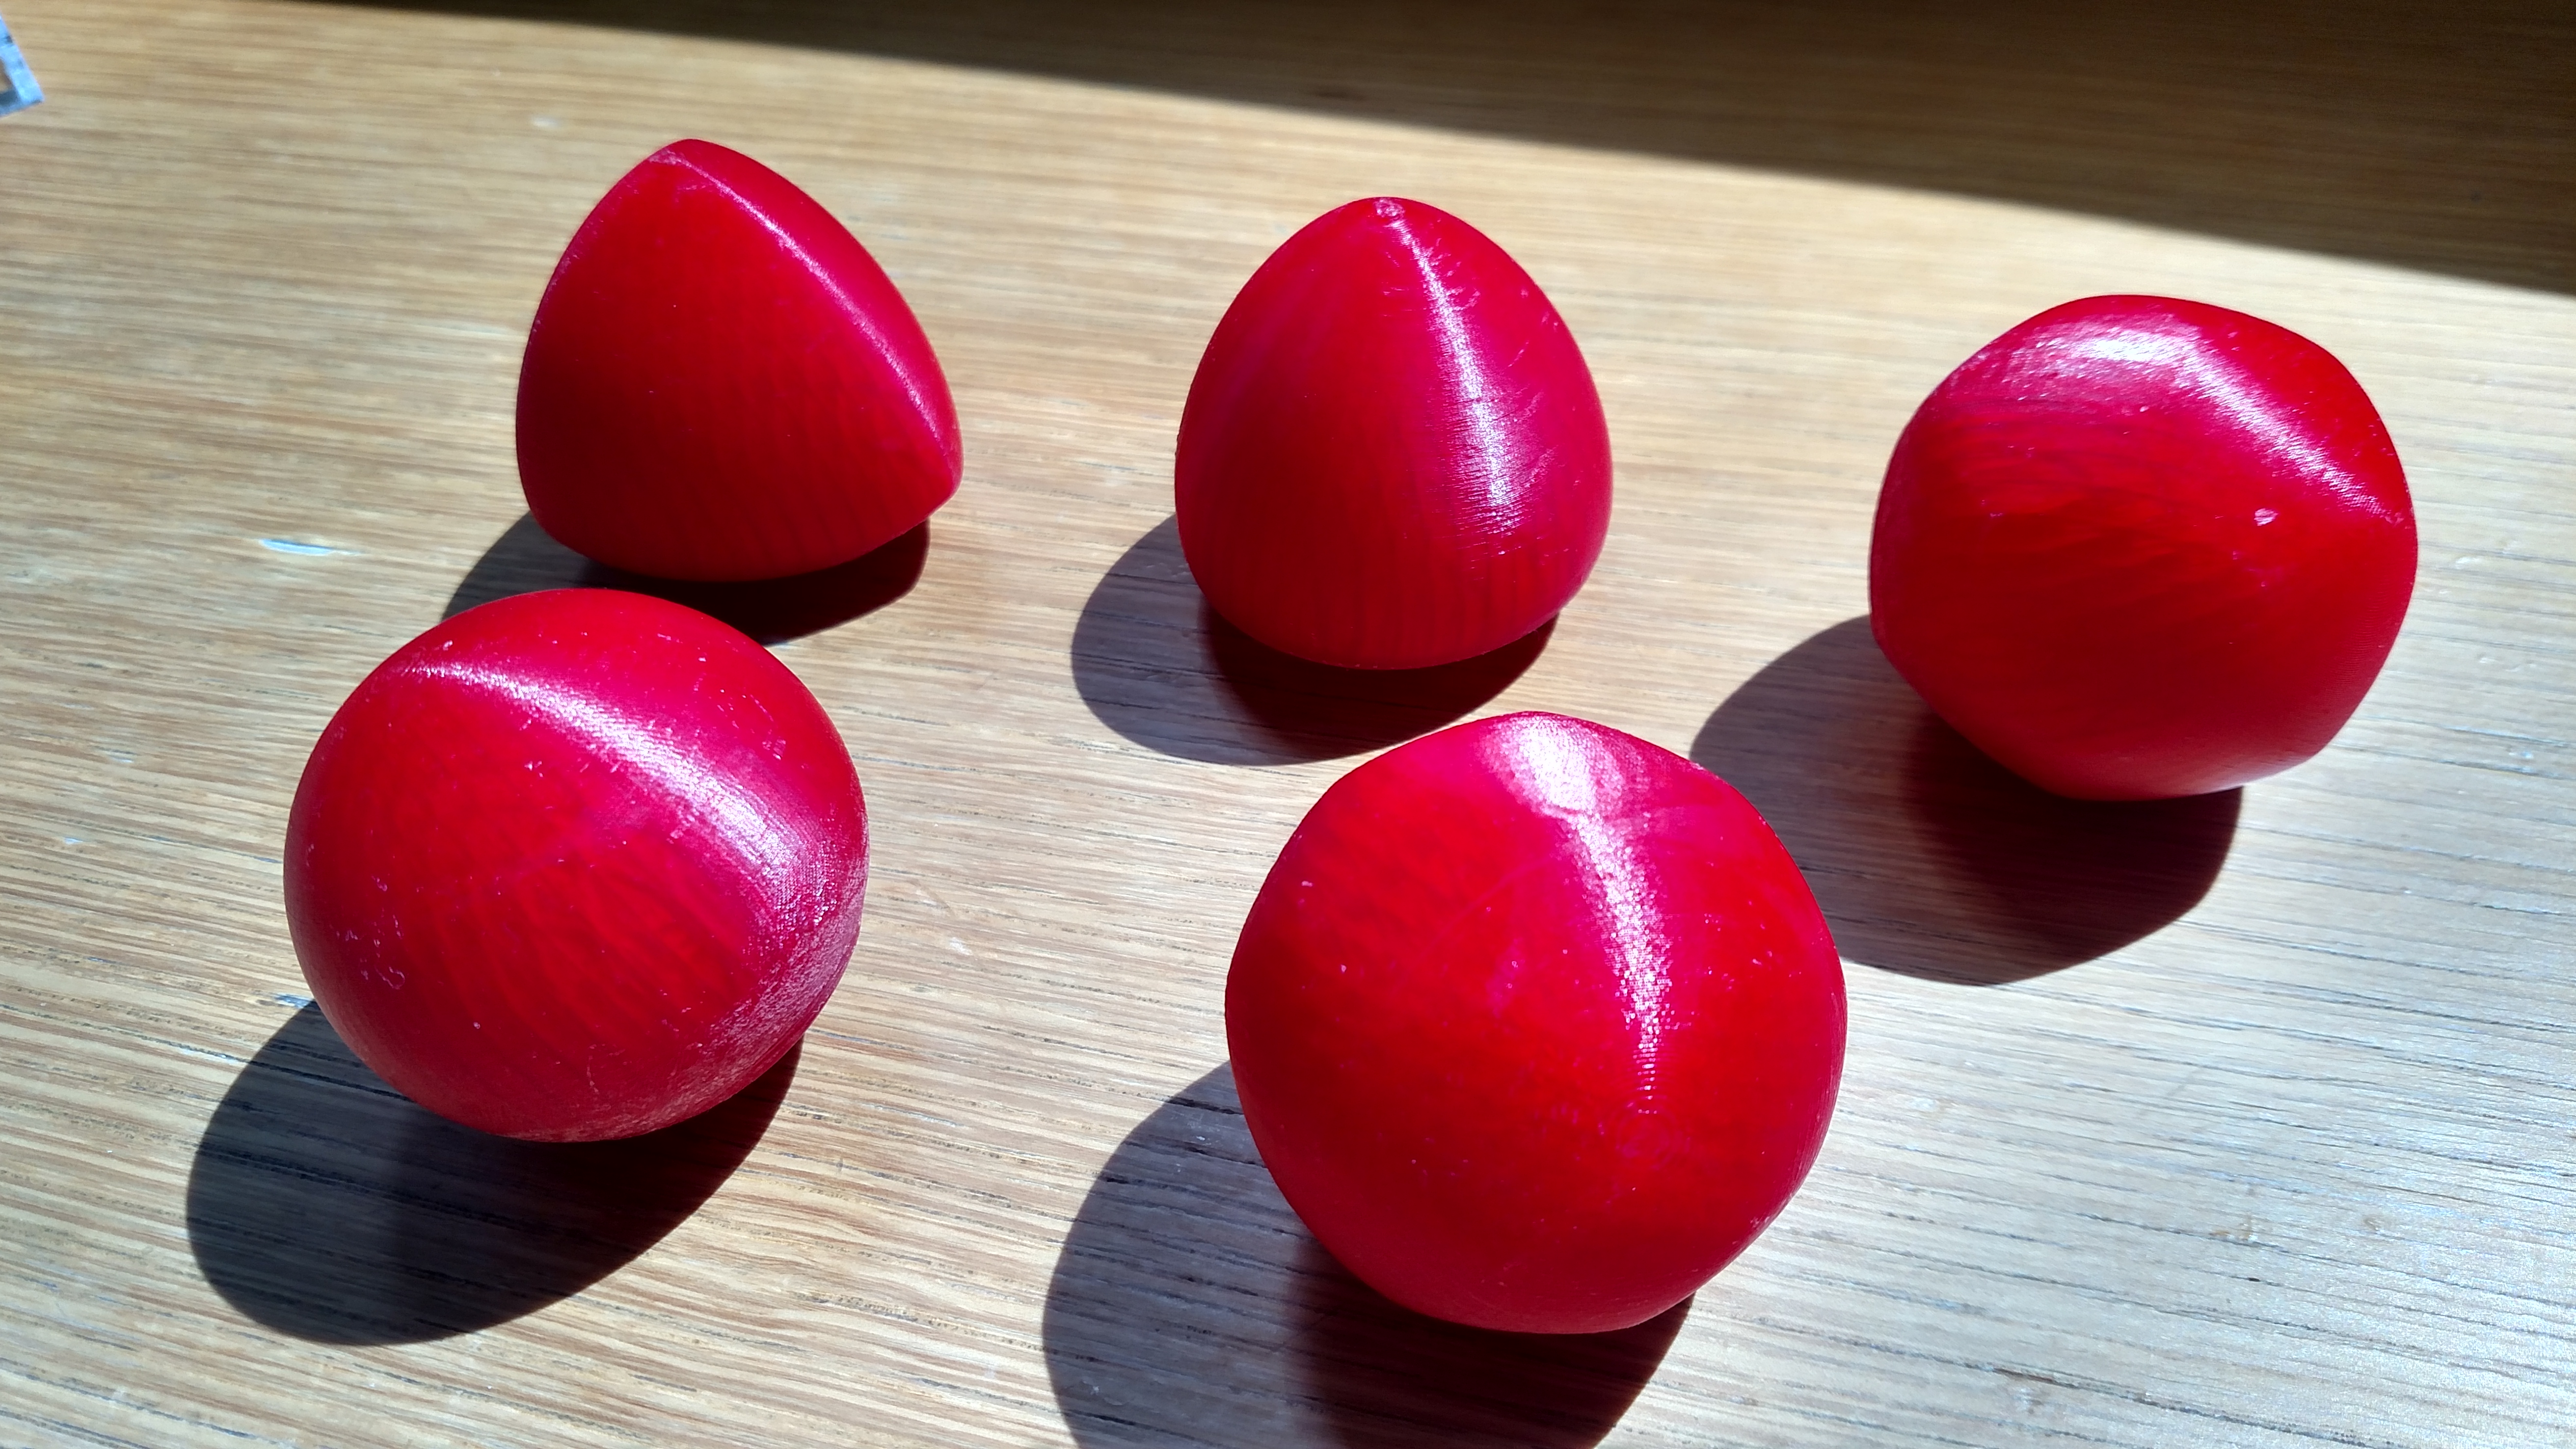
We carried out this same process on a number of bodies of constant width, to varying degrees of success. Pictured below are the results:
3D printed bodies of constant width with tetrahedral, octahedral, icosahedral, rotational (any angle around one axis) , and spherical symmetry .
As a fun way to present these objects, we also created an acrylic box with a single circular hole in the top. Each body has the same width (defined as in the first post) as the hole, and so they can all fit through (in some direction).
Each object can fit through the hole. This box was made on a laser printer using a template from makeabox.io
Here’s another video demonstrating how these bodies can be used as rollers:
The box remains level and at a constant distance from the ground.
We had a lot of fun with this project, and want to thank our professor Kyle Ormsby for his knowledge and enthusiasm! We hope you found these posts both mathematically and visually interesting. If you’d like to play around with some of these shapes and ideas yourself, have a look at our mathematica code here.
← Back to Project Project Home