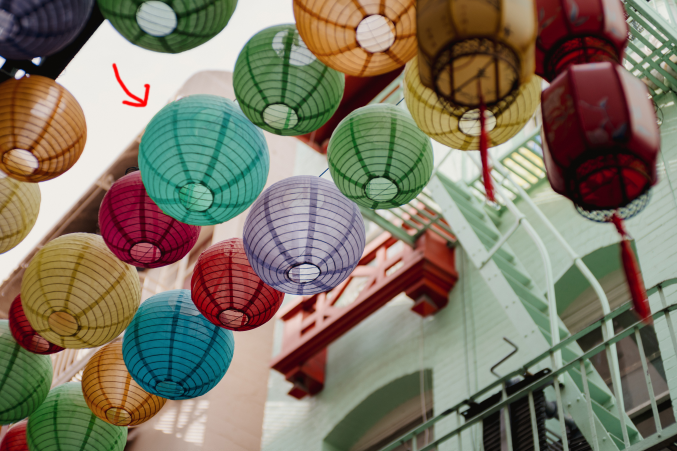
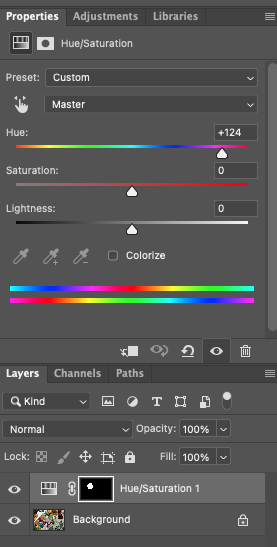
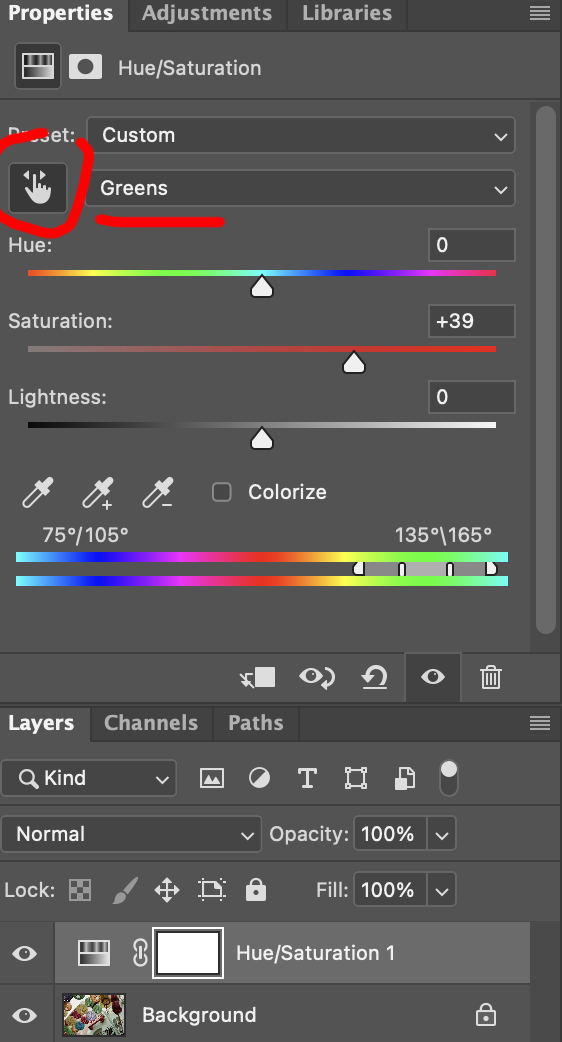
Representation of color RGB//Hue Saturation Brightness
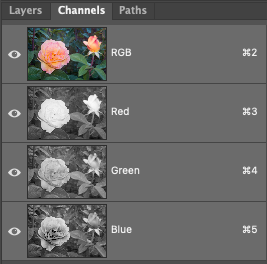
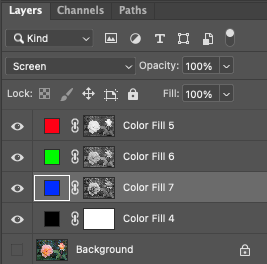
RGB


from wikimedia


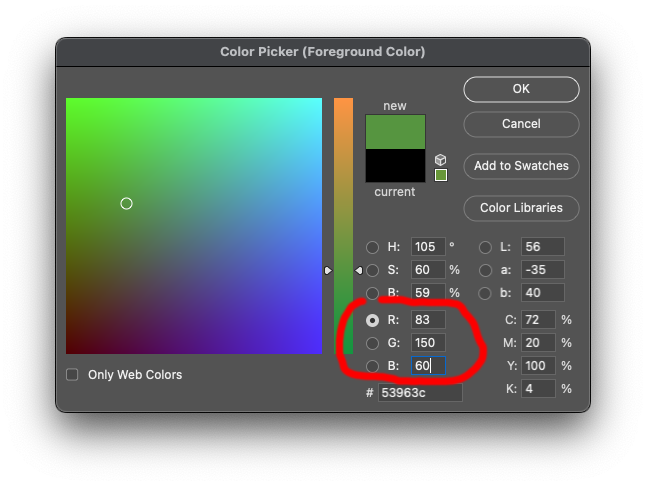
  • r, g, b: (in 8 bit/channel)


  • 255, 0, 0: red
  • 128, 0, 0
  • 64, 0, 0

  • 0, 255, 0: green
  • 0, 128, 0
  • 0, 64, 0

  • 0, 0, 255: blue
  • 0, 0, 128
  • 0, 0, 64

  • 255, 0, 255: magenta
  • 0, 255, 255: cyan
  • 255, 255, 0: yellow

  • 128, 128, 128:
  • 64, 64, 64
  • 0, 0, 0


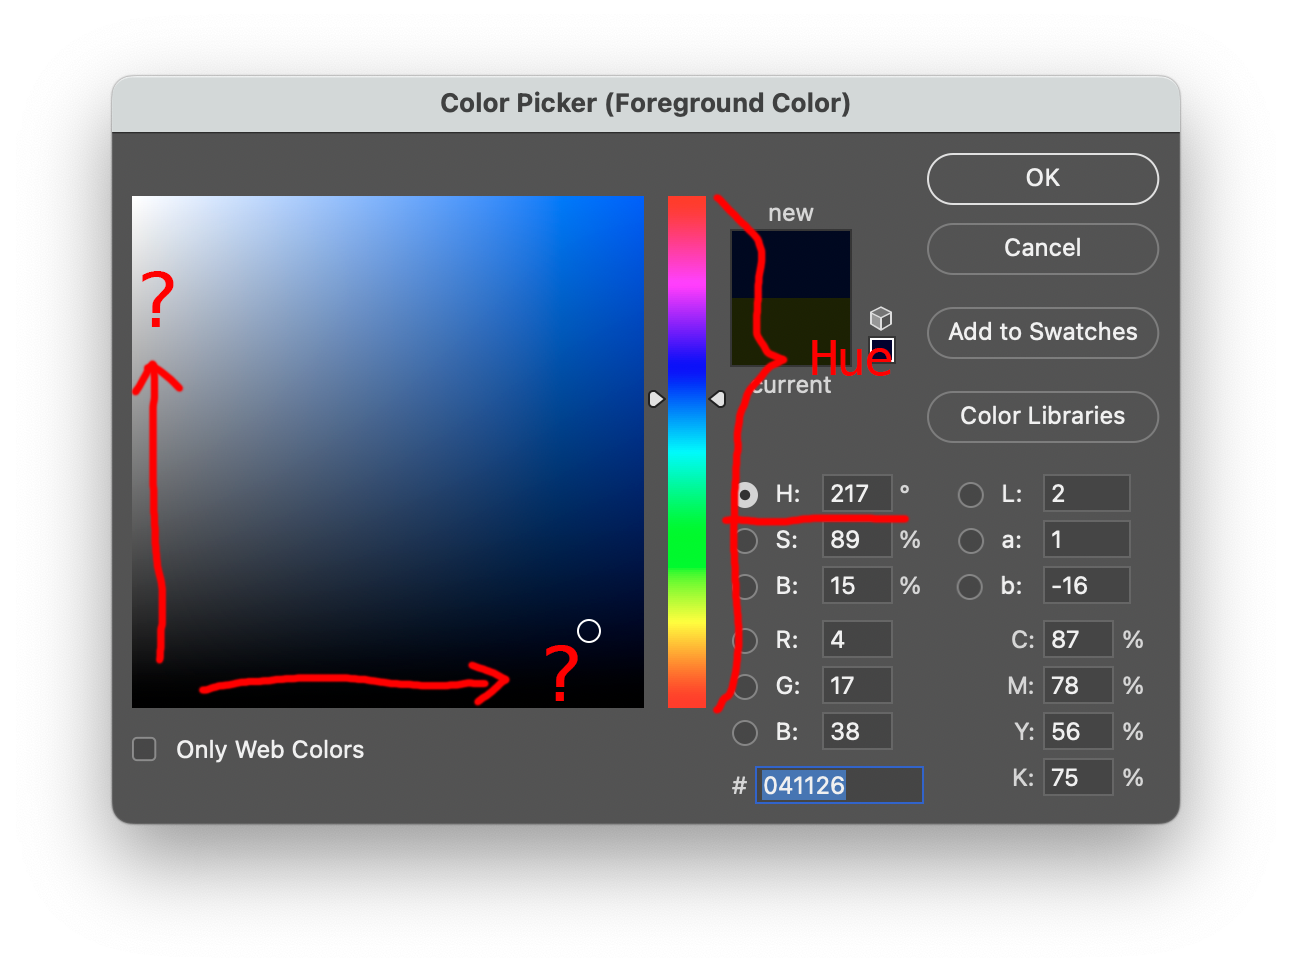
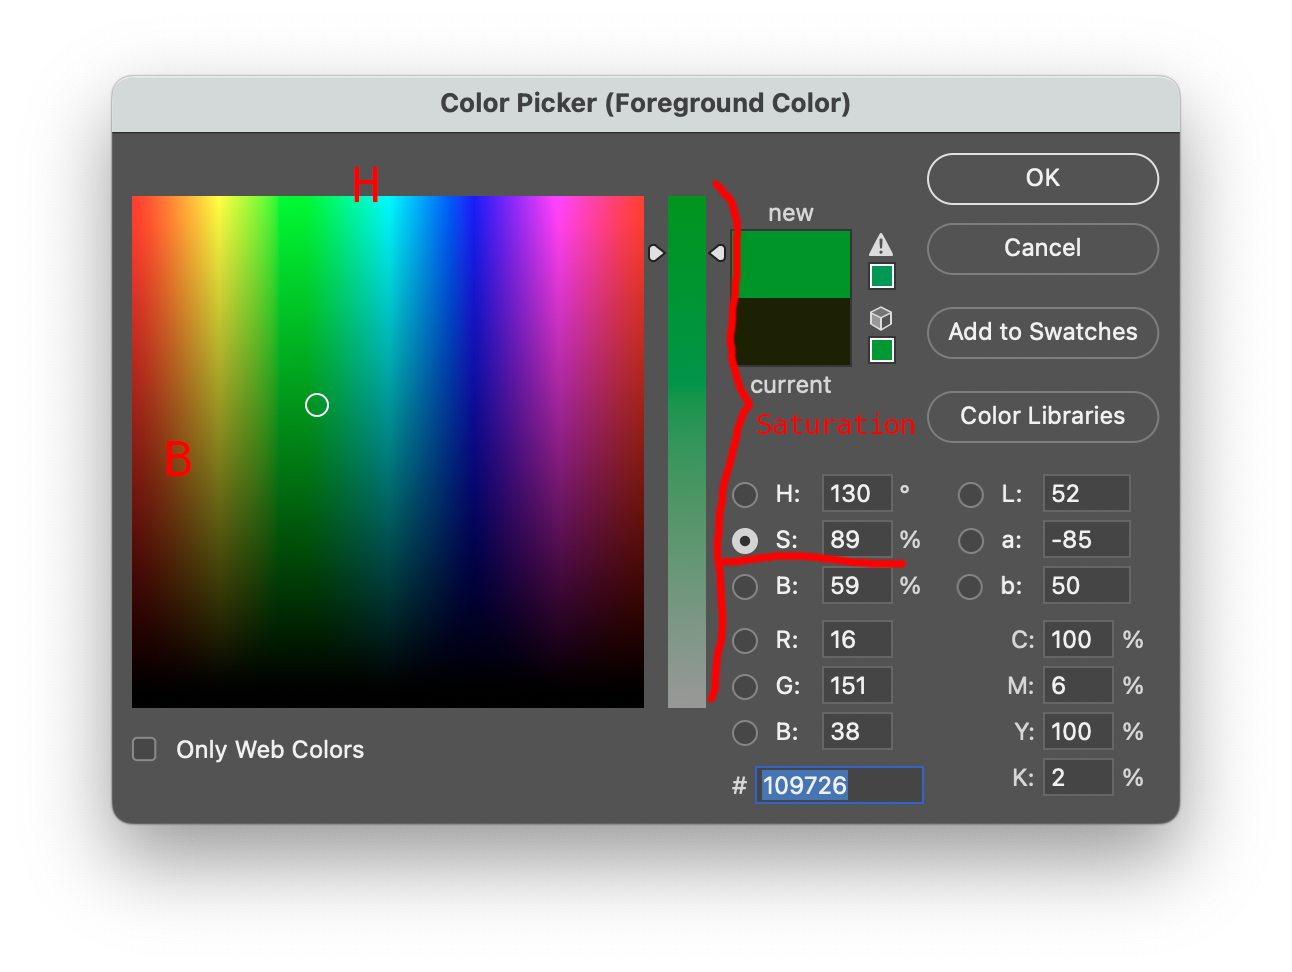
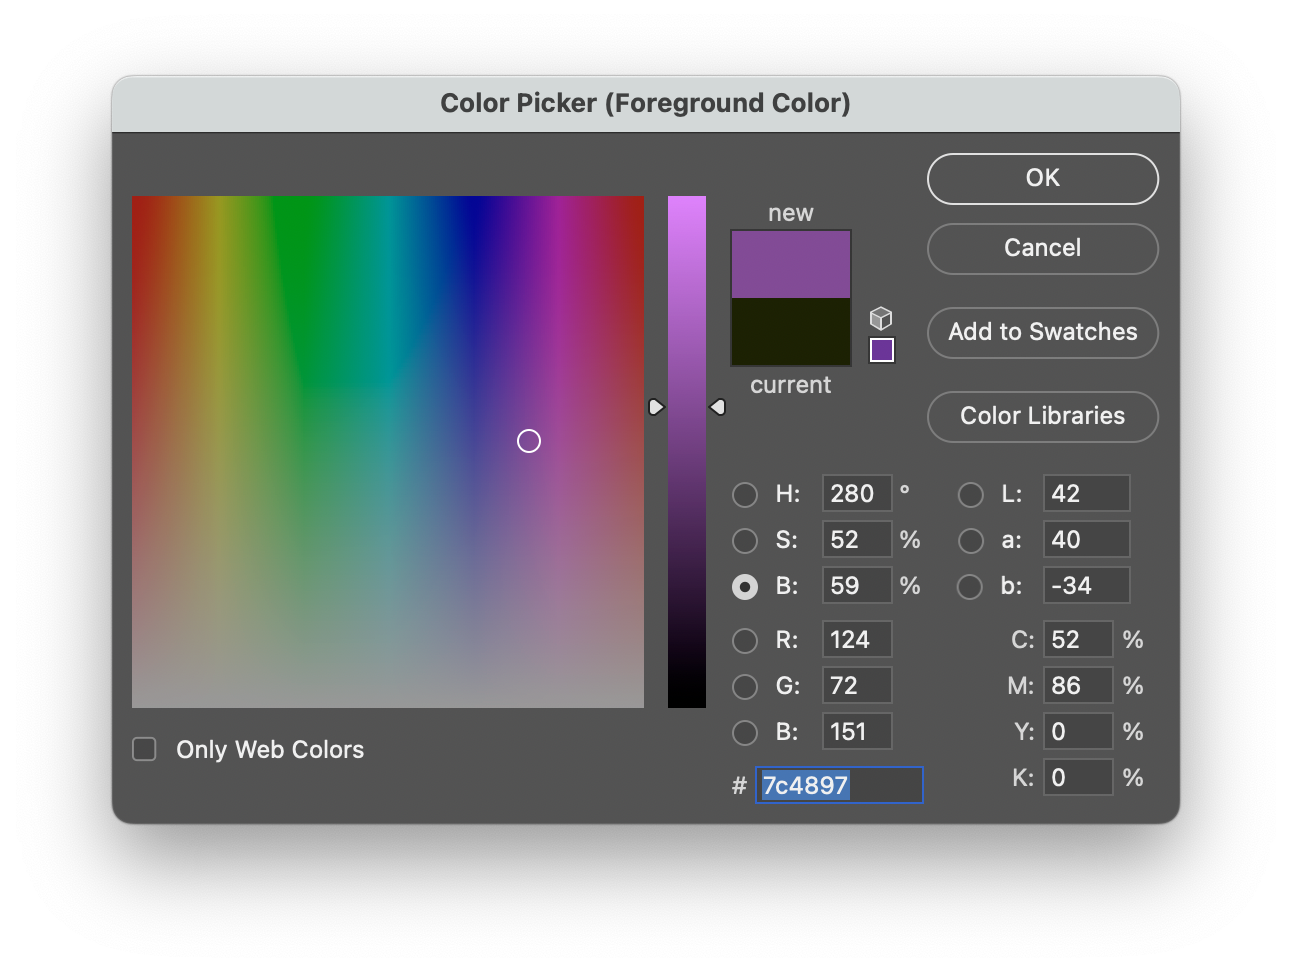
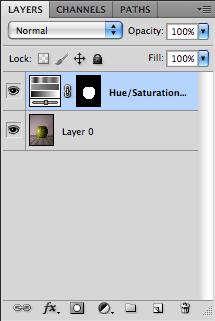
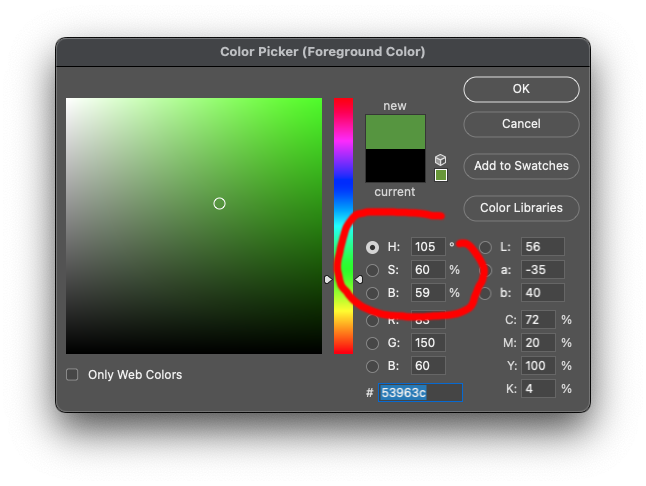
Hue Saturation Brightnesss


from http://www.handprint.com/HP/WCL/color7.html
from https://en.wikipedia.org/wiki/Munsell_color_system

Notes

Color picker Hue/Sat tool

Notes

Hue Sat Adjustment (without masks)


With masks


Targetted Adjustment with ranges


Use the hand tool to select target color
  • drag hand (sideway): changes the saturation of area
  • cmd+drag hand: changes hue of area


Notice that when you drag, the dropdown menu automatically goes to the colors (yellows, blues...etc)

Notes

Curves

Notes

Color mixing/Channels


Notes

RGB channel

  1. Open a fully colored image in photoshop

  2. Make sure only the colored original photo is highlighted in the layers panel.

  3. Go to the Channels panel. (To make the thumbnail larger, right click and choose size)


  4. Click and choose one channel to isolate r or g or b
    • You'll see a b/w image. This is the intesity of red, green, or blue light
    • White: Value 255 of that colored light
    • Black: 0 of that colored light
    • Gray: in between


  5. Cmd-click on b/w image thumbnail on channel to select.

    • Marching ants only encircle the pixels you are selecting more than 50%. But in fact, you are selecting ALL based on intensity.
    • White area -- you are selecting 100%, black area you are selecting 0%, and gray in between


  6. With the selection active, go back to layers panel, make Solid Color that matches the color channel you selected

  7. You should have solid color with a mask


  8. Repeat this for red, green, and blue so that you have three solid colors with the mask made from the appropriate channel


  9. Make a black solid color and put it under neath the red green blue layer and turn the original color image off.
  10. Turn the blending mode of the red, green, blue solid color layer to "screen"


You should have the full colored image back!!!
Notes

Color from B/W

Instructions!!
Past student work
Notes

Extra Review Materials

Notes

Adjustment Layer + Layer Mask = Local Corrections

Layer masks

Notes

Clipping Mask


Right-click on the adjustment layer and select "Create Clipping Mask". Then the adjustment layer will only apply to the layer immediately below it.


Notes

Selection to Layer Mask (Adjustment Layers)

1. With selection (Marching ants), create new adjustment layer


2. selection automatically converted to layer mask


Notes

Flattening Image

Once you are done and ready to commit:

Background layer
  • When you open an image, Photshop puts it in a layer called Background, which has restrictions (as represented by the lock sign).
  • If you want to unlock and modify the background layer and treat it as a normal layer, double click and make it into Layer 0a
Notes