onMouseOver and onMouseOut
In JavaScript, these event handlers are actually written in camel case (with each word after the first capitalized).
Let's look at an example using the onMouseOver event
Using the onMouseOver and onMouseOut event, you can create an image rollover.
[sample file]
We are using something we will learn later here.
this refers to the HTML element itself. So in this case, the img HTML element. If you recall the idea of DOM, we can access things inside the objcts (like properties) with the dot notation. So, what you are accessing via this.src is the src attribute inside the img object.
  onClick
  onMouseOver
  onMouseOut
Unfortunately, in HTML when using it as an attribute, you have to write it in lower case.
Let's look at an example using the onMouseOver event
<!DOCTYPE html>
<html>
<head>
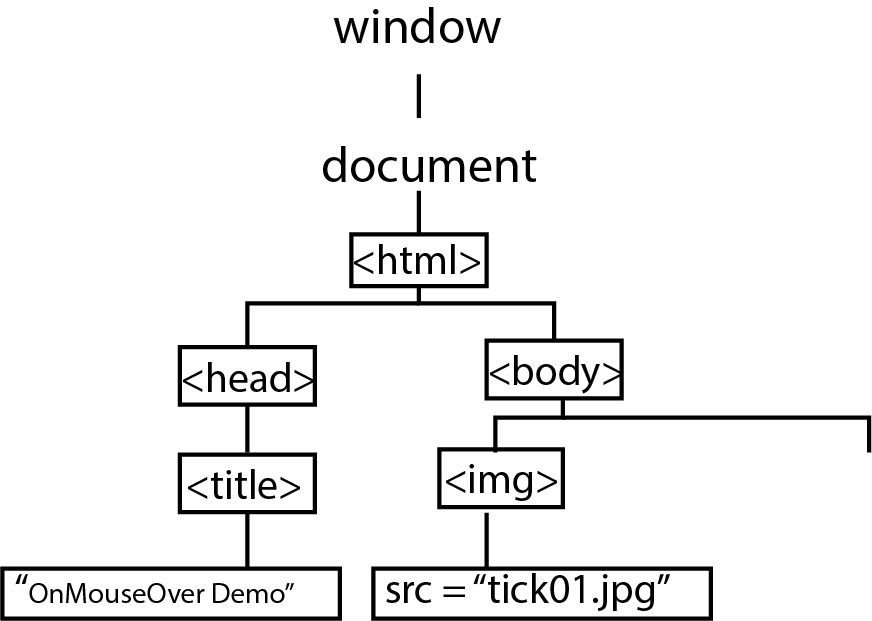
<title>onMouseOver Demo</title>
</head>
<body>
<img src="tick01.jpg" alt="image 1" onmouseover="alert('You entered the image!');" />
</body>
</html>
[sample file]
Using the onMouseOver and onMouseOut event, you can create an image rollover.
<!DOCTYPE html>
<html>
<head>
    <title>OnMouseOver Demo</title>
</head>
<body>
    <img src="tick01.jpg"
    onmouseover="this.src='tick02.jpg';"
    onmouseout="this.src='tick01.jpg';" />
</body>
</html>
[sample file]
We are using something we will learn later here.
this refers to the HTML element itself. So in this case, the img HTML element. If you recall the idea of DOM, we can access things inside the objcts (like properties) with the dot notation. So, what you are accessing via this.src is the src attribute inside the img object.
Note that this is where you NEED to use single quotes instead of double quotes
  in HTML you need to put double quotes around the attribute value

  <img src=" ">
  <onmouseover=" ">

  in Javascript you have to put represent the file name as strings using double quotes or single quotes to indicate they are not variables

  this.src = "tick01.jpg"
  this.src = 'tick01.jpg'


  // When you combine javascript and HTML there is a problem!
  // if you use double quotes around tick01.jpg...

  <onmouseover="this.src = "tick01.jpg";">     // BAD


  // it will be interpreted like this
  "this.src = "                     tick01.jpg         ";"

  // A STRING                      VARIABLE            STRING


  // to prevent that you would use a single quote so that the double quote (string) does not end prematurely
  "this.src = 'tick01.jpg';"


  Or you can  do this

  'this.src = "tick01.jpg";'
Notes