Vocabulary: details matter
- Advice 1: Stick to one format. Hard/painful to mix
- Advice 2: Please don't use 4K for this class
Key terms ('standards' that Premier, FinalCut, DaVinci Resolve...etc understand)
- Aspect ratio
- Resolution
- Scanning method
- Frame rate
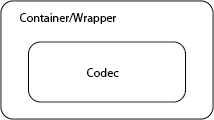
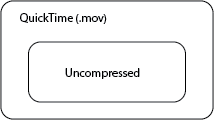
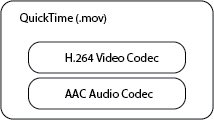
- Codec
Modes we need to understand:
HD: 4K, 1080p, 1080i, 720p
- Resolution: Pixels dimensions of your video
4K (we won't be using this in class. Too big == takes too long to do things)
- 3840 x 2160 pixels
HD: digital video with a resolution of at least 1280 x 720 pixels
- HD
- 1080 stands for 1920 x 1080 pixels
- 720 stands for 1280 x 720 pixels
- Aspect ratio: 16:9
- SD (or SONY calls it STD)
- 720x480 pixels
- Aspect ratio 4:3 or 16:9
- Why would we want 1080 or 720, 16:9 or 4:3?
- Frame rate
- 60 fps (frames per second)
- 30 fps
- 24 fps
- ... actually there are like 8 different frame rates being used in HD
- why any of these framerates? why not 1?
- Scanning method: p or i
Video is a series of still pictures displayed fast enough to create the illusion of motion. Scanning is the process of displaying pictures on the screen.
- P (progressive scan) - display the entire image at once
- I (interlaced) - each picture is divided into two fields composed of
all the even lines in the image, followed by all the odd lines and displayed in sequence
- why would one use interlaced?

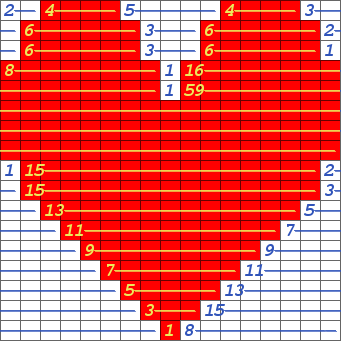
image From Final Cut Pro 7 Manual
Effects of interlacing:

- CRT (cathode ray tube) monitors: electron gun draws lines of light on the screen left-to-right, top-to-bottom
- Flat panel: composed of fixed grid of pixels.
- CRT (cathode ray tube) monitors: electron gun draws lines of light on the screen left-to-right, top-to-bottom
"Interlaced video is a technique for doubling the perceived frame rate of a video display without consuming extra bandwidth. It effectively doubles the time resolution (also called temporal resolution) as compared to non-interlaced footage (for frame rates equal to field rates)." (from Wikipedia)
So in summary, HD TV has three modes:
720p
- progressive video
- resolution: 1280 x 720
- used in: broadcast television, internet downloads/streaming, video games, artists video1080i
- interlaced video
- resolution: 1920x1080
- used in: broadcast television, internet downloads/streaming, video games, artists video
- not necessarily better than 720p. 720p suited for high-motion subjects.
- ESPN, ABC, and Fox use 720p
- PBS, CBS, NBC, and HBO use 1080i
- List of current American high-definition channels
1080p
- progressive video
- resolution: 1920 x 1080
- used in: Blu-ray, internet downloads/streaming, video games, artists video
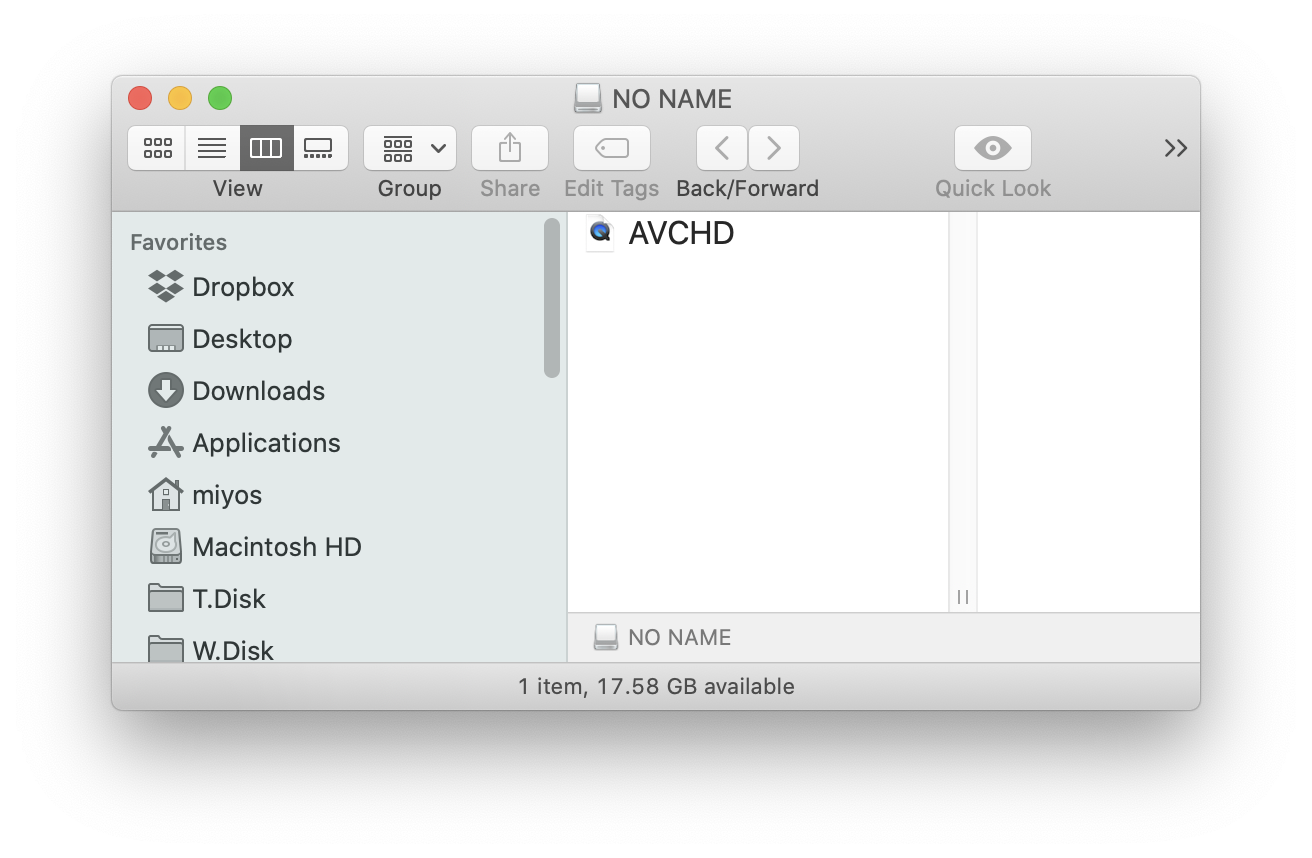
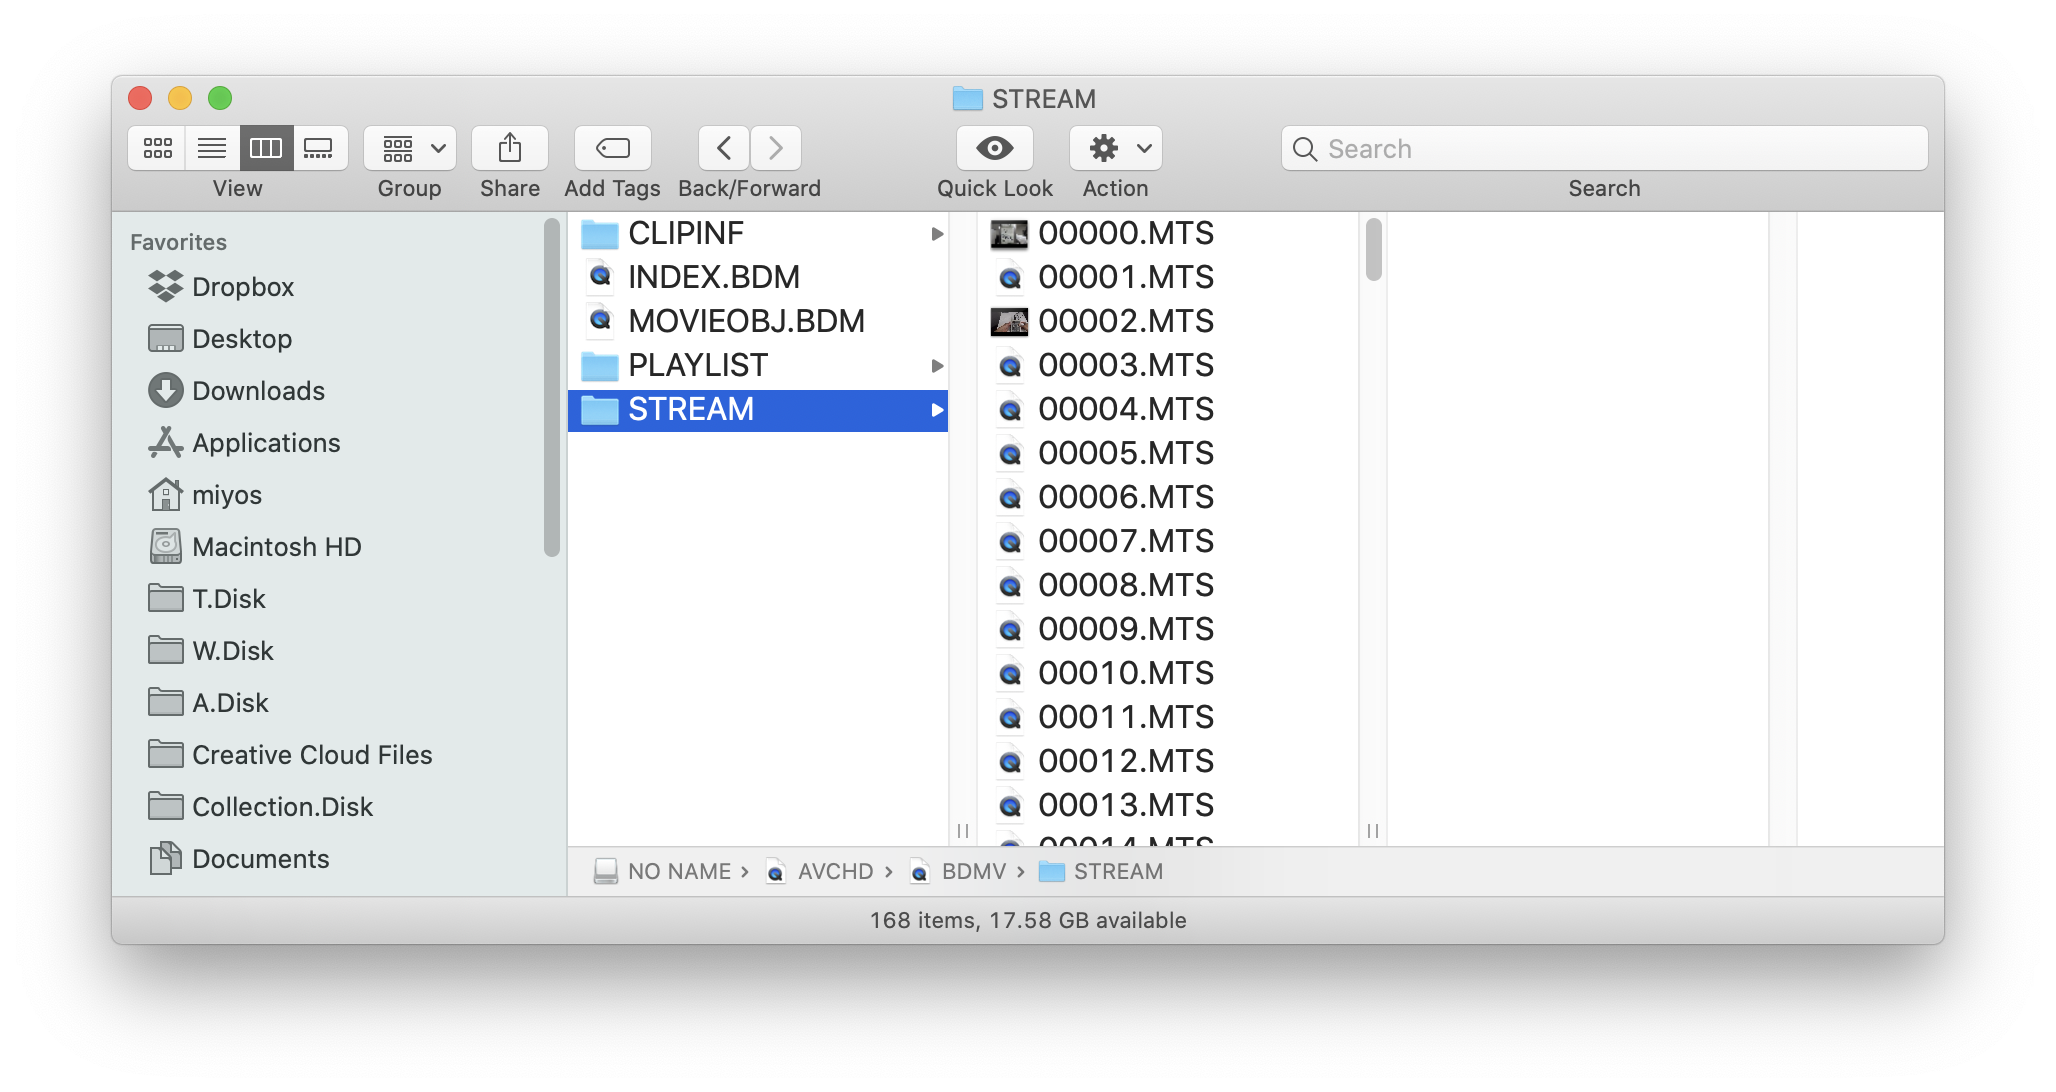
Look at the sample video files in the Media folder in the Google Drive folder to see the difference between video standards. - P (progressive scan) - display the entire image at once
Notes