Incorporating DVD Video into a Powerpoint presentation (Windows XP)
1. Tools Needed:
1.1. Codecs
1.1.1. Divx http://www.divx.com/divx/
1.1.2. MP3 http://www.codecsdownload.com/cgi-bin/TopDown/download.pl?file=0026
1.2. DVD Ripper/Movie Editor: DVD Shrink http://www.dvdshrink.org/where.html
1.3. Re-Encoder: XMPEG http://www.mp3guest.com/Xmpeg_Index.asp?l=US
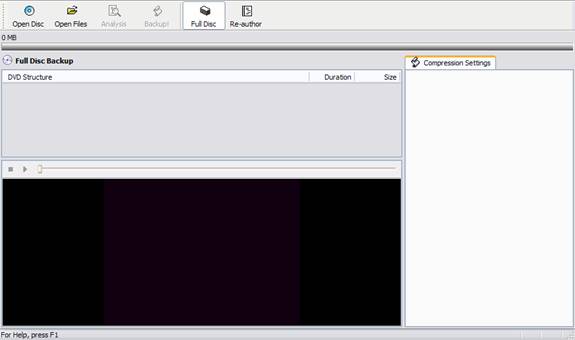
2. DVD Shrink
2.1. Start DVD Shrink.
2.2.
2.3. Insert DVD. Your DVD Player and/or software on the DVD disc may start. Quit/cancel these other programs.
2.4. Click on 'Open Disc.' Select your DVD. It will take a minute or two to analyze.
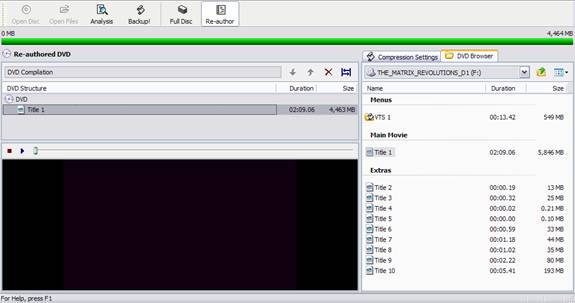
2.5. Click on 'Re-author.' Drag the first title under 'Main Movie' to the area under 'DVD Structure.
2.6.
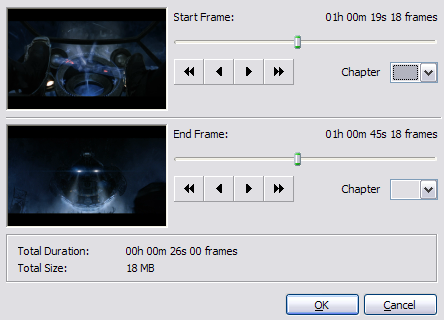
2.7. Right-click on the title you just added and select 'Set Start/End Frames'
2.8. A box will pop up. Drag the top slider to the beginning of the clip you are trying to cut. Drag the bottom slider to the end of the clip. Use the "chapter" boxes to narrow it down to a single chaper, the double arrows to advance about 7 seconds at a time, and single arrows to advance by 1/2 second for precise control.
2.9.
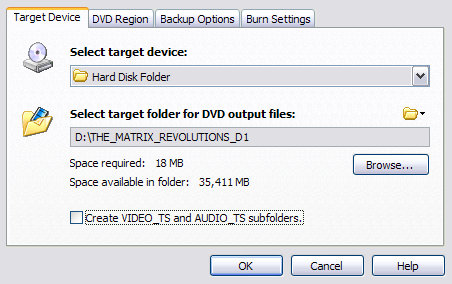
2.10. Click OK, and you are back in the main window. You may now click on the play arrow to preview your clip. To continue, click Backup. In the dialog box that pops up, select "Hard Disk Folder," then type in a target folder (the folder icon on the right will helpfully name a folder for you)
2.11.
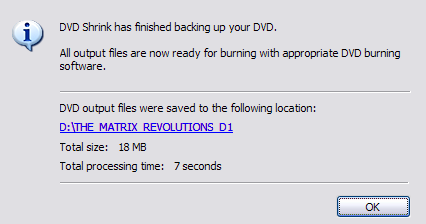
2.12. Click OK. You've now ripped and edited the video. Now all you have to do is convert it so that your slideware can show it. The following box will pop up that will show you where your video is located:
2.13.
3. XMpeg
3.1. Start XMpeg. When it opens the first time, it will perform some speed checks (do not be alarmed…) It will then open the Video Conversion Wizard. Click Next to continue.
3.2.

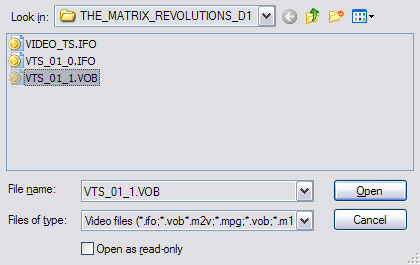
3.3. On the next dialog, click Browse.
3.4.
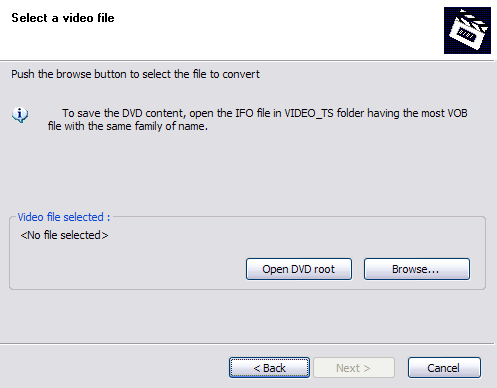
3.5. Find the VOB file you just extracted, then click Open and Next.
3.6.
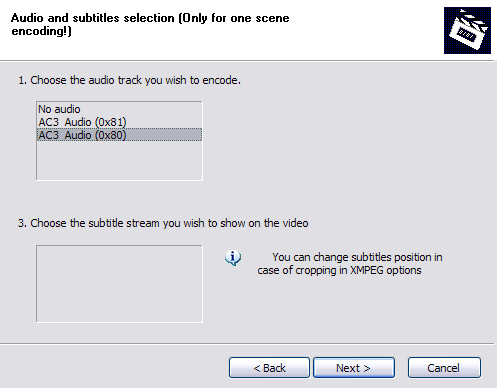
3.7. Choose the audio you would like (Optional: choose the subtitles). Usually, this will be the audio track with the lowest number (in this case, 0x80). Click Next.
3.8.
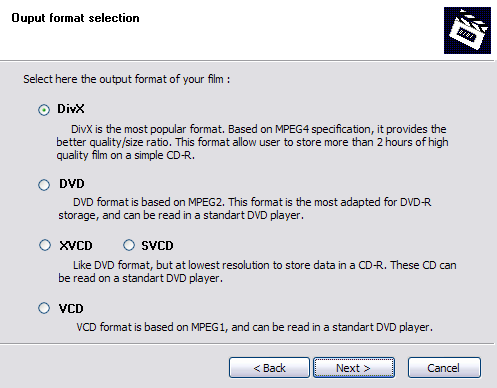
3.9. Choose DivX, then click Next.
3.10.
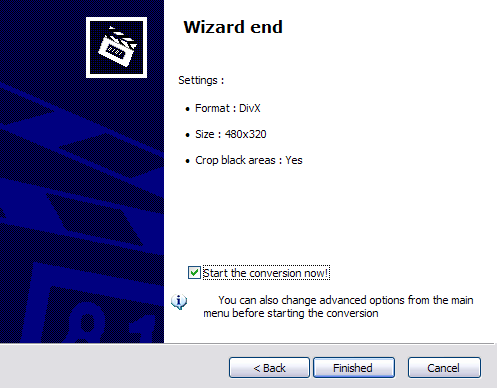
3.11. Choose video size and cropping. The auto-crop will usually work. You should stick with the standard video size settings, or select 480x320 if you would like a more reasonably-sized file. Then click Next.
3.12.

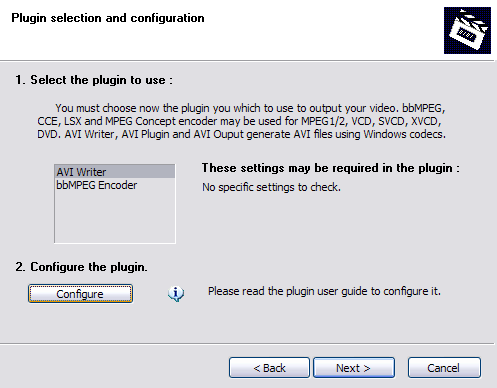
3.13. Configure the AVI Writer plugin. Click Configure.
3.14.
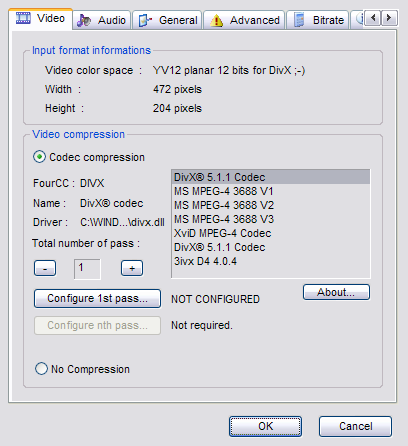
3.15. Now click on Configure 1st pass.
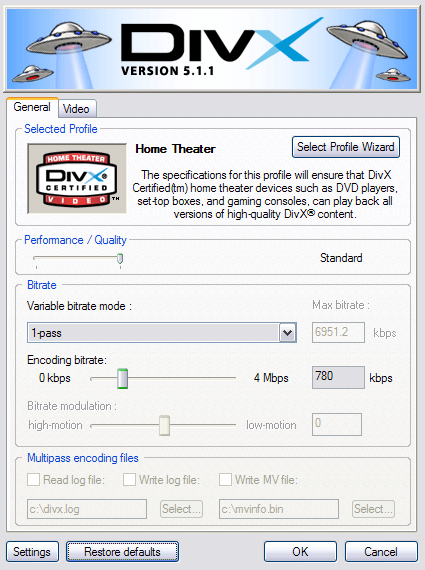
3.16.
3.17. Select 780 kbps under "Encoding bitrate," then press OK.
3.18.
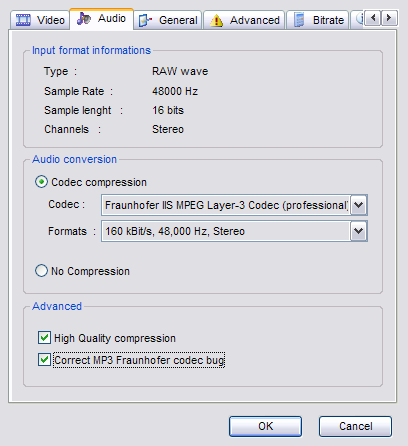
3.19. Select the Audio tab, then select "Codec compression", "Fraunhofer (professional), and Formats (160 kBits/s, 48,000 Hz, Stereo), and make sure the "Correct MP3 bug" is selected. Click "OK" to continue.
3.20.
3.21. Click "Finished" to start processing.
3.22.
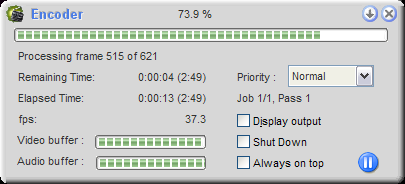
3.23. Watch it convert!
3.24.

3.25.
3.26. Your file will be saved as c:\Output Video File.avi; Share and Enjoy.